

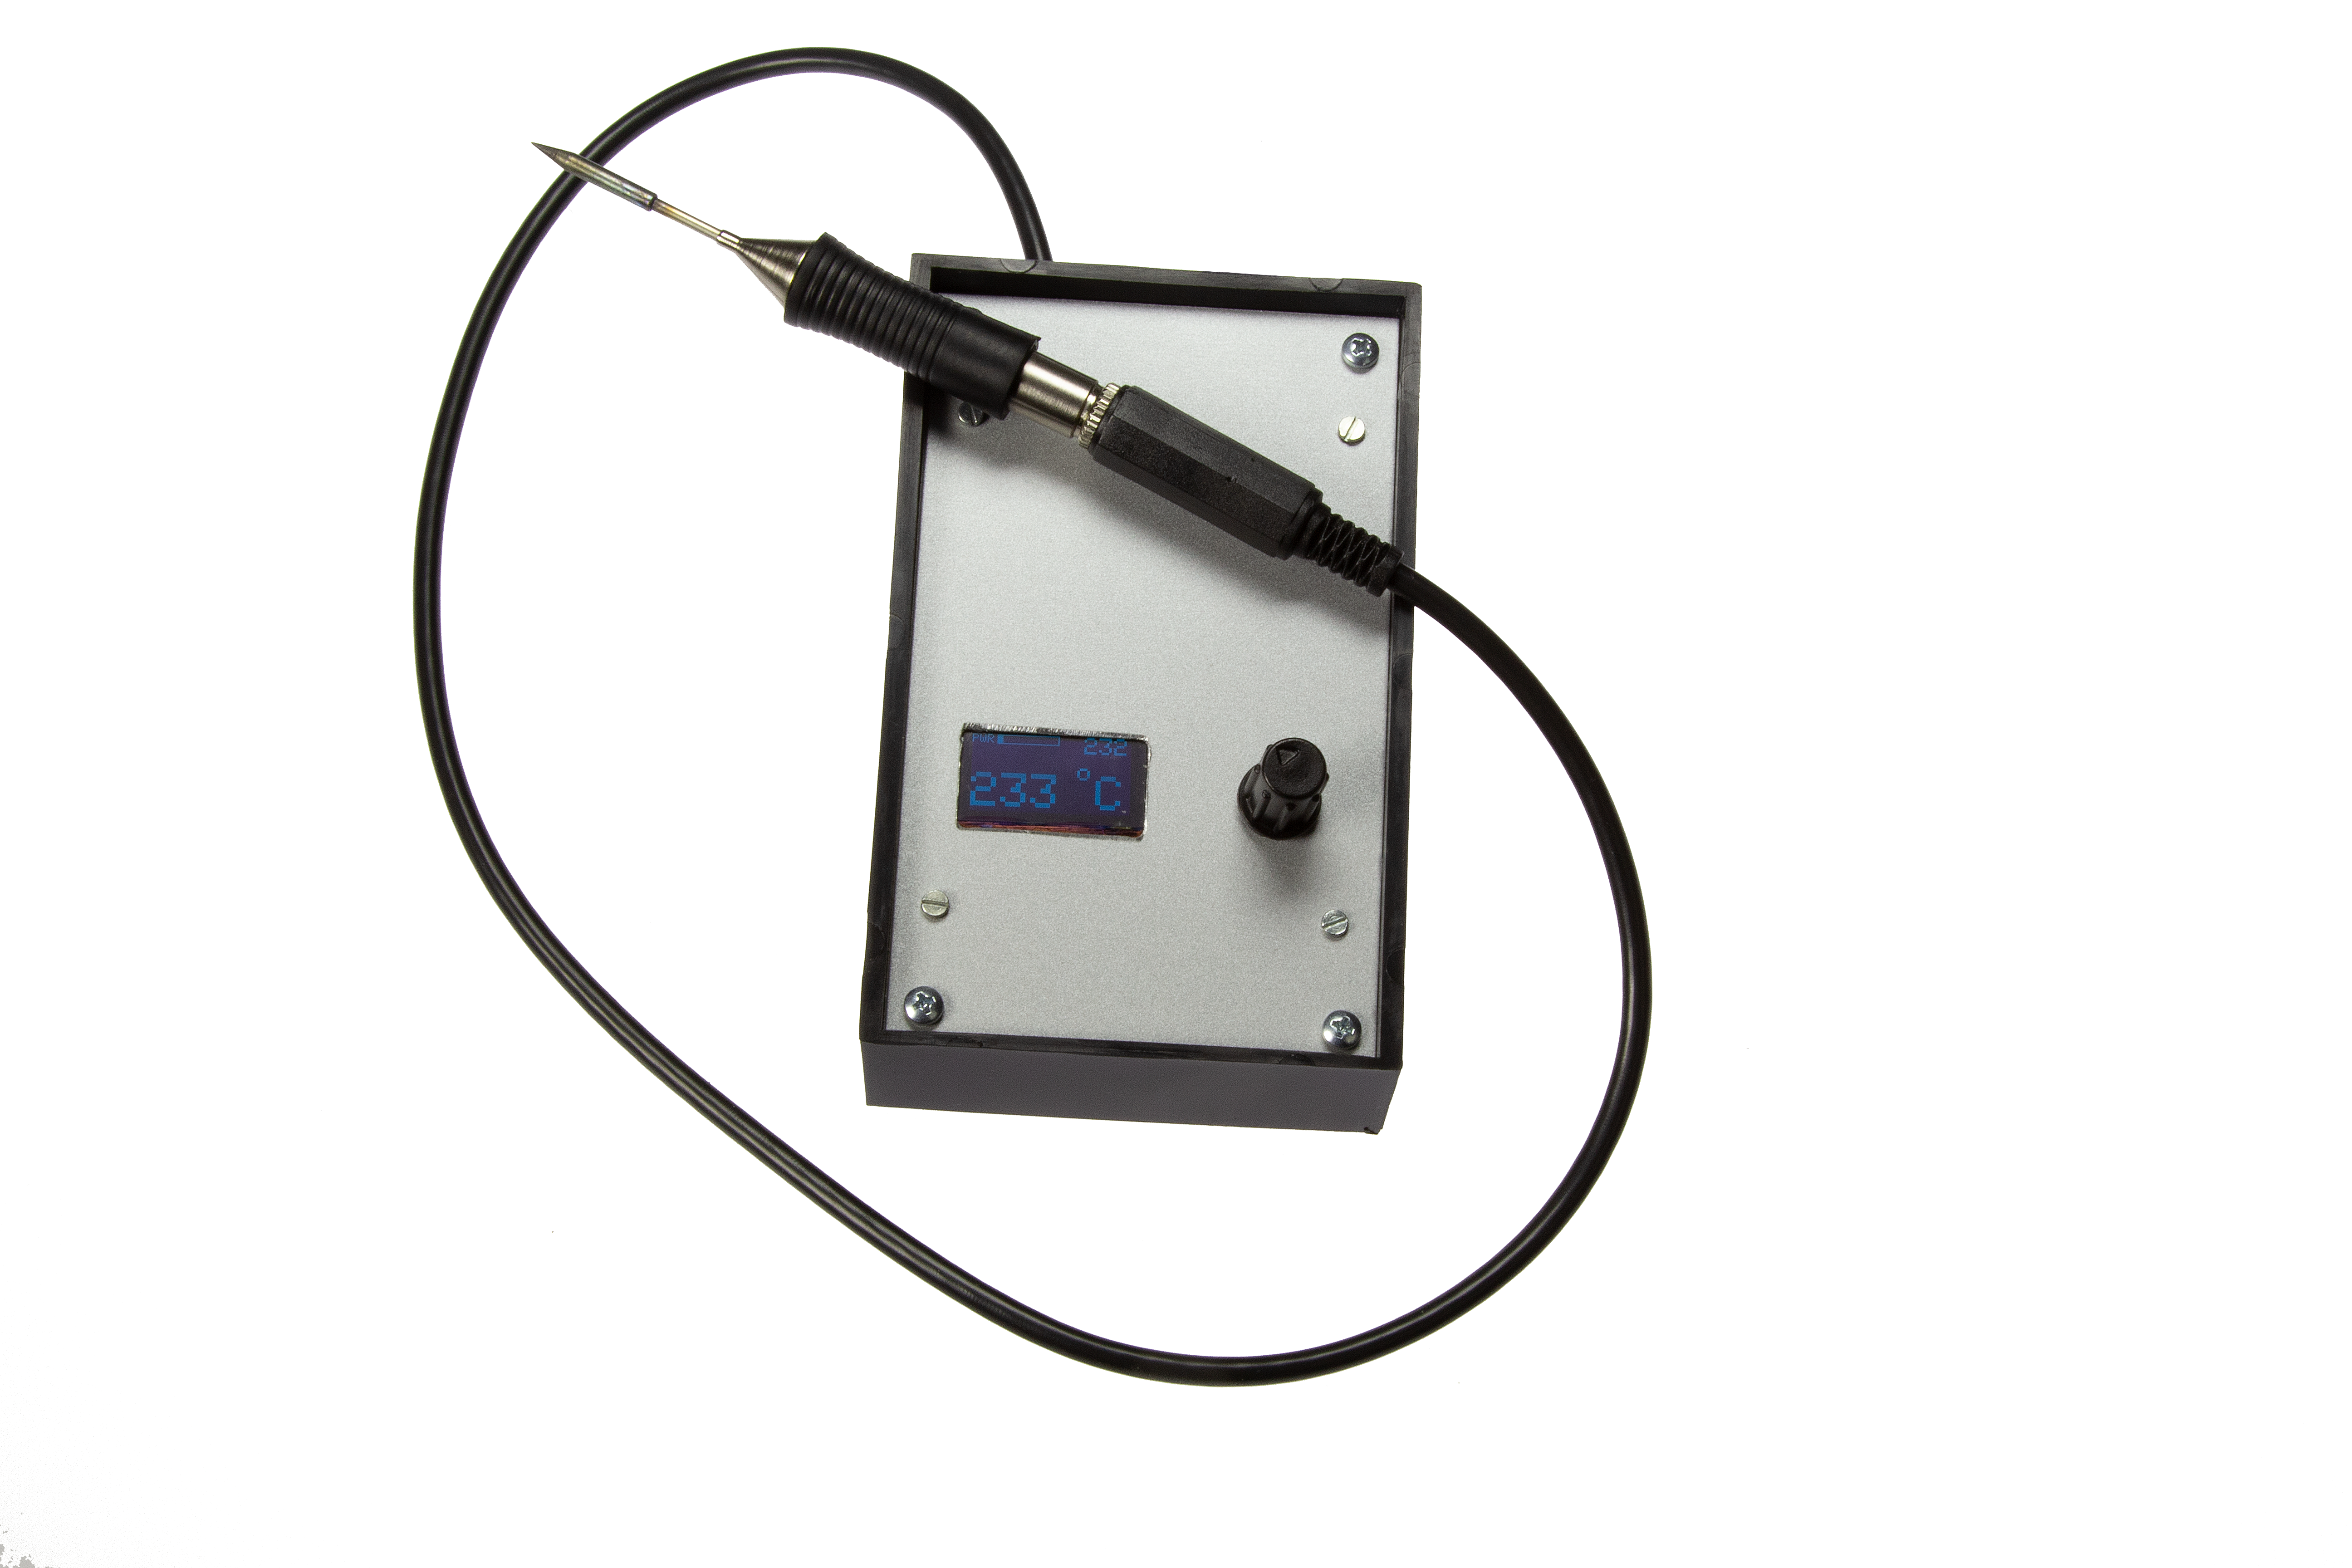
DIY Temperature Controlled Solder Station
SMD manual soldering for everyone
This is a MEMBER ONLY article. You need a subscription to read this article.
- Unlimited access to online Member Only articles
- 3 new editions Elektor Magazine (digital)
- More than 5000 Gerber files
- 20% member discount on e-books (at elektor.com)
- 10% member discount on Products (at elektor.com)
Available from €5.33 per month.
What is Members Only
Elektor is committed to providing high-quality content on electronics, catering to tens of thousands of paying members. As part of this commitment, Elektor has launched Premium, an initiative that offers exclusive online articles to members sometimes even before they appear in the magazine.
Every day, members can access in-depth articles that showcase the best of Elektor's premium content.
This initiative aims to reward members with early access. Once logged in, members can easily enjoy this exclusive content and engage in discussions about featured projects. While Premium adds to the existing resources available, Elektor will continue to provide a wealth of free information.
Join the Elektor community today to take advantage of Premium and other benefits!
Gerber file
CAM/CAD data for the PCB referred to in this article is available as a Gerber file. Elektor GREEN and GOLD members can exclusively download these files for free as part of their membership. Gerber files allow a PCB to be produced on an appropriate device available locally, or through an online PCB manufacturing service.
Elektor recommends the Elektor PCB Service service from its business partner Eurocircuits or AISLER as the best services for its own prototypes and volume production.
The use of our Gerber files is provided under a modified Creative Commons license. Creative Commons offers authors, scientists, educators and other creatives the freedom to handle their copyright in a more free way without losing their ownership.
Component list
Component List
Resistors
Default: SMD 0805, 100mW, 1%
R1,R5,R7,R8,R16,R19 = 10kΩ
R2,R3 = CG0603MLC-05E, ESD suppressor, USB compatible, SMD 0603
R4,R6 = 22Ω
R9 = 2.7kΩ
R10 = 18kΩ
R11 = 1MΩ
R12,R13 = 5.6kΩ
R14 = 10MΩ
R15,R20 = 100Ω
R17 = 4.7kΩ
R18 = 0.02Ω, 2 W, SMD, current sense resistor
R21 = 100kΩ
R22 = 560kΩ
Capacitors
Default: SMD 0805
C1,C2,C12,C13 = 10nF
C3 = 10 µF 35 V, Case C
C4,C5,C8,C9,C10,C14,C16,C21,C23 = 100nF
C6 = 47µF 10V, Case A
C7,C18,C20 = 10µF 10V, Case A
C11 = 22µF 10V, Case A
C15,C22,C24 = 1µF
C17,C19 = 22pF
Inductors
L1 = Ferrite, 3A, 30Ω @ 100MHz, 0805
Semiconductors
D1 = CD1206-S01575, SMD 1206
D2 = MBRS540T3G
D3 = BAT54
D4 = S1A
T1 = IRF9540NSPBF
T2,T3 = BC847
T4 = BC857
IC1 = NCP1117ST50T3G, SOT-223-3
IC2 = MCP6002-E/SN
IC3 = INA138NA/250G4
IC4 = ATmega32U4-AU
Miscellaneous
ENC1 = Rotary encoder with pushbutton, Bourns type PEC11R-4225F-N0024
F1 = PTC, 15V, Ihold = 0.5A, 4.5×3.2mm
K1 = 2-way terminal block, 0.2” pitch
K2 = micro USB type B connector
K3 = 3-way terminal block, 0.2” pitch
K4 = 6-pin (2×3) pinheader, 0.1” pitch
LCD1 = OLED display, 0.96”, 128×64, SPI interface
X1 = 16MHz quartz crystal
6-pin SIL pinheader, 0.1” pitch, for LCD1
6-way pinheader socket, 0.1” pitch, for LCD1
Enclosure (suggested): Teko type 102 110 × 70 × 46mm)
PCB # 180348-1 (Elektor Store)
Discussion (0 comments)
Mark Johnson 6 years ago
ClemensValens 6 years ago
The PCB does not have these problems and is correct.
JohnHind 6 years ago
ClemensValens 6 years ago
The completed & corrected schematic is available at the Elektor Labs page of this project.
JohnHind 6 years ago
A couple of details worry me though:
1. There is no discussion of ESD and the need to ground the soldering tip. If built as suggested the tip will probably be floating because most DC 'bricks' are double-insulated and do not ground their output. It will probably be necessary to run a ground wire from the mains plug to the control board ground.
2. The article is absent details of the Weller RT tip used - it does not even give the pin-out of the three pin jack plug! This set me to doing some online research. According to Weller's web site the RT tips are rated at 40W. The article states that the firmware limits the current to 1.5A and the voltage is 12V. This means that the design is driving the tips at 18W maximum, less than half the rated wattage!
3. The article states that the 'heater voltage' is measured by the software, but there is no obvious provision for this in the schematic. Sorry if I have missed this, but this schematic is a perfect example of my long-standing personal hobby horse, the 'Elektor Lazy Bus', making it unnecessarily hard to read. The OLED connections should be one bus, the ICSP another, arguably ENC1 a third, and the remaining connections drawn individually.
ClemensValens 6 years ago
2. The power is limited in software in order to avoid having to use a heavy power supply. At the Elektor Labs page of this article you can read how to change this.
3. That was a secret last-minute addition of the designers and therefore missed in the published schematic. Please see the Elektor Labs page of this article for the revised schematic.
JohnHind 6 years ago