Backup your data with Raspberry pi

As Murphy's Law says, there are two type of users: those who have lost data and those who are about to lose data.
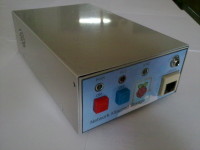
As Murphy's Law says, there are two type of users: those who have lost data and those who are about to lose data. To prevent a second event of this type (can you guess which type of user I am?), I have built a NAS (Network Attached Storage) composed by a 2-TBytes USB hard disk and a Raspberry pi, which connects the hard disk to my home network via Ethernet.
- Uses as a mass storage system an USB hard drive, much cheaper than one with Ethernet interface.
- One side of the Raspberry pi (USB) is connected to the hard disk, and the other side (Ethernet) to the network. No need to talk about the benefits of Raspberry Pi. Just mention that consumes far less than an old computer used for this purpose, and its price is negligible compared to the hard disk.
- The Raspberry Pi, the hard drive with its USB interface and the on-off circuitry fit in a compact case.
- “Samba” network interface. Any backup program can be used. There are many of them "open source".
- The original part of this design is that power can not be forgotten switched on, because when not in use automatically switches off, keeping consumption = 0 (not even stand-by consumption).
Software:
To install the software you must follow this steps:- Install the last Raspbian “wheezy” as explained in:
- It’s a good idea to set the Raspberry pi with a fixed IP address. Then, you can find the board from windows explorer faster than looking for it by it’s name.
To do this, you must edit the file interfaces as follows:
$ cd /etc/network
$ sudo nano interfaces
replace the line “iface eth0 inet dhcp” with:
iface eth0 inet static
address 192.168.1.101
netmask 255.255.255.0
gateway 192.168.1.1
- Now, you must create a directory where the external USB drive will be mounted, and edit the file fstab to mount it automatically each time system starts. I selected the name backup for that directory.
$ sudo mkdir /media/backup
$ cd /etc
$ sudo nano fstab
add at the end of the file:
/dev/sda1 /media/backup auto users,uid=1000,gid=100,utf8,dmask=027,fmask=137 0 0
- You must install the samba filesystem and edit the configuration file smb.conf:
$ sudo apt-get install samba smbfs
More information in:
http://chirale.wordpress.com/2012/08/31/turn-raspberry-into-a-small-nas-with-samba/
$ /etc/samba
$ sudo nano smb.conf
Add at the end of the file:
[backup]
comment = Public
read only = no
locking = no
path = /media/backup
guest ok = yes
force user = pi
create mask 0777
directory mask 0777
- You must install the utilities that allows you to manage the Input/Output bits present in the Raspberry pi connector.
$ sudo apt-get install git-core
A complete information can be found in:
https://projects.drogon.net/raspberry-pi/wiringpi/download-and-install
- The monitor program uses the utility lsof that must be installed too.
- Besides all Linux installation, the central part of the design is a program called nasmonitor that monitorizes the hard disk activity. After some time not being used, the monitor shuts down the system. I installed it in the directory /home/apli. Now, it’s necessary to tell the system to run this program after each start-up.
$ cd /etc
$ sudo nano rc.local
add at the end of the file:
/home/apli/nasmonitor
Photos description:


Discussion (1 comment)