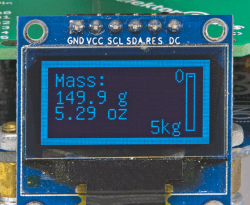
Kitchen scale with Arduino flavour
on

128x64 pixels
Measuring the strain
Its resistance varies with the mechanical compression or tension. A strain gauge appears as a wire or maybe as a long thin strip, folded back on itself, and glued onto a flexible support. When the device is stretched, the resistance of the strip increases. When it returns to its original dimensions, it decreases.Our scales have two other plusses: the use of a small OLED display at the base and the fact of being built around an Arduino. Two weighty assets!
A specialized 24-bit A/D converter
The force sensor of this weighing scale is in the form of a bar with a bridge circuit of four strain gauges. One end of the bar is fixed to the chassis of the scales; the object to be weighed is placed at the other end and causes the bar to flex slightly,
In spite of the four gauges set up as a Wheatstone bridge, the output signal is very low, of the order of several tens of millivolts, so it is necessary to amplify it before digital conversion and processing.
Fortunately, we can easily find specialized integrated circuits capable of amplifying and converting our signal. Here it is the CAN HX711 from Avia Semiconductor, a 24-bit ADC offered on a small board ready to use. Its stream of digital data is processed by the Arduino board and a sketch that relies heavily on a communication library with the HX711. The measured weight is sent as a signed 32 bit integer and converted to grams with a calibration factor.
All the components are comprised in the Elektor semi-kit - the unpacking and assembly are shown in the video above.


Discussion (1 comment)