The PTS200 is a recent model of portable, smart soldering iron, renowned for its robustness and high power. Check out this detailed review of the PTS200 soldering iron, with detailed features and performance testing.
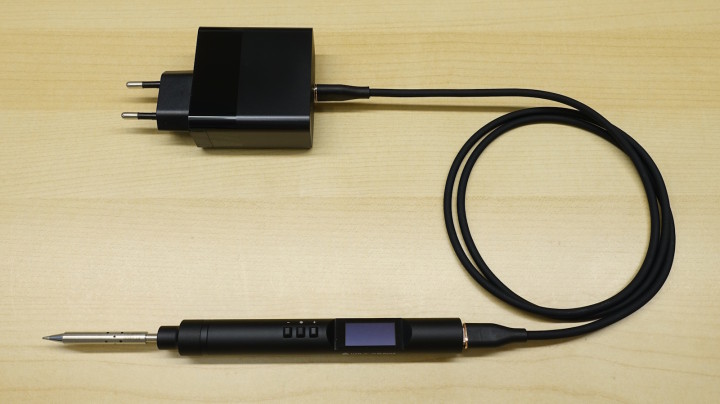
The PTS200 is a recent model of portable, smart soldering iron, renowned for its robustness and high power. Let’s discover its features and test its performance! The sleek PTS200 with the supplied power adapter and cable.
Overview
The PTS200 follows in the footsteps of other smart soldering irons, such as the TS100, TS101, TS80, Pinecil, etc. It is a compact soldering iron using cartridge technology, with an OLED display and three control buttons, all driven by an ESP32-S2FH4 microcontroller from Espressif. The manufacturer claims high heating power, up to 100 W. This is achieved thanks to special 4 Ω cartridges and a well-sized control MOSFET (30 V, 12 A). The iron is also compatible with competing brands of tips, and is flexible in terms of power sources. Being compatible with PD3.0, QC2.0 and QC3.0 protocols, it can be used with most power adapters featuring a USB-C output or USB power banks. It can also be powered by any voltage source or battery between 9 V and 20 V, using an adapter not supplied. In the version tested here, it is sold with a 20 V / 100 W USB-C power supply, a USB-C cable and four tips.
Subscribe
Tag alert: Subscribe to the tag Prototyping & Production and you will receive an e-mail as soon as a new item about it is published on our website!
Unboxing the PTS200
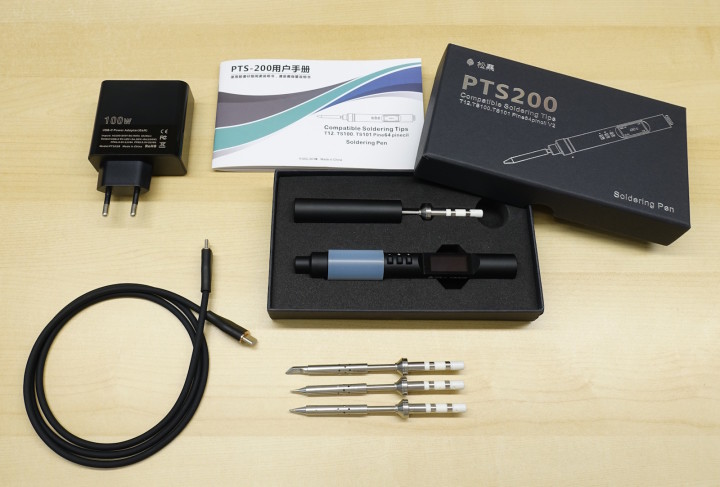
Contents of the kit.
The package contains:
A nice cardboard box containing the iron, a cap for the iron, a soldering tip and a paper manual in English and Chinese
a 1 m long, highly flexible, silicone-sheathed USB-C cable
three additional tips
a 100 W USB-C power supply
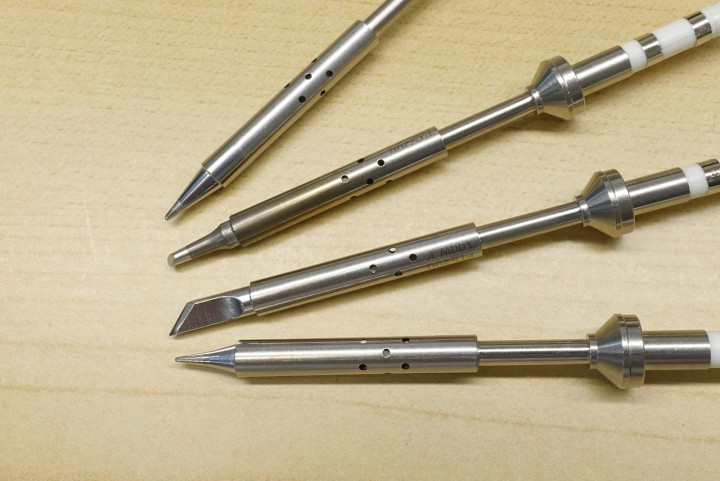
The assortment of supplied tips covers most uses.
First Thoughts
The iron is compact and cylindrical in shape, with dimensions of 16 mm in diameter and 190 mm in length (194 mm with cap). It’s machined from a bar of aluminum alloy and has a beautiful black anodized finish; the whole thing looks great and feels very sturdy, and fits well in the hand with its weight of 50 grams without the cap. A small silicone sleeve is provided at the fingertips for a better grip and also serves as protection against heat. The distance between the grip and the end of the tip is approx. 85 mm. The cap is simply pushed onto the iron, and held in place by friction using a small piece of silicone tubing inside the cap.
The tips supplied are of the “cartridge” type, as on many irons in this category. The principle of the cartridge is that the heating element, the measuring thermocouple and the iron tip are assembled in a single piece. This improves heat transfer and regulation speed. In this case, the four tips supplied are: a medium conical tip (B2), a fine conical tip (I), a beveled tip (BC2) and a knife tip (K). The tips seem to me to be of good quality. In particular, the machining quality of the tip is excellent, and the middle part, halfway between the tip and the connecting rings, is also machined from a solid block of copper alloy. The tips are marked “PTS200” and have a resistance of around 4 Ω, enabling them to reach a theoretical maximum power of around 100 W at 20 V; this will be tested later. Note that the iron is also compatible with T12, TS100, TS101 and Pinecil tips, which are of lower power but nevertheless quite useful. Beware of the the reversed thread!
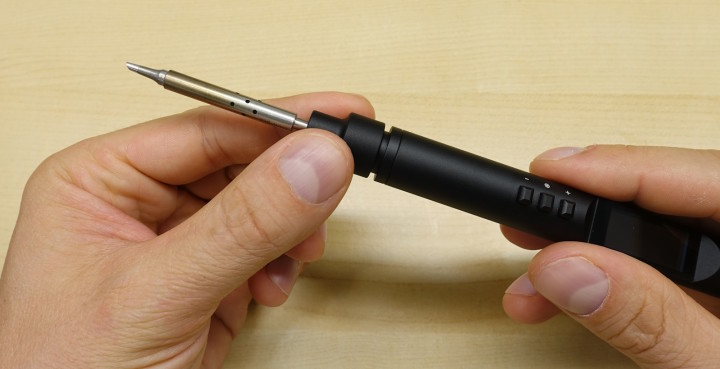
The manufacturer has provided a tip locking ring that must be unscrewed to replace the tip. Please note that the screw thread is reversed! This was probably done to prevent the next part of the case from accidentally unscrewing when changing the tip. It’s a good idea, but in practice unscrewing in reverse requires a mental effort. If you try to unscrew in the usual direction, it’s the wrong ring that unscrews, which starts to dismantle the iron. I advise you to be vigilant, or use a little threadlocker to avoid this inconvenience.
I was impressed by the quality of the USB cable supplied. It’s extraordinarily flexible, and is sheathed in silicone to resist accidental contact with the iron’s tip. I measured a total resistance (positive and negative wires added together) of around 150 mΩ, which is a good score; there will inevitably be a loss of a few %, but that’s the case with all soldering irons using USB cables. The cable also works for data transfer, but only in USB 2.0 High Speed mode. My Fnirsi FNB58 USB tester did not detect any e-marker in the cable.
Subscribe
Tag alert: Subscribe to the tag Review and you will receive an e-mail as soon as a new item about it is published on our website!
Using the PTS200
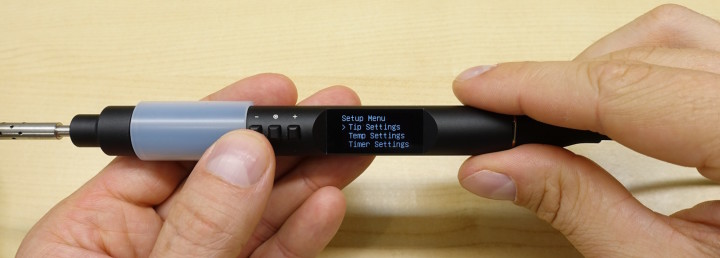
When the iron is connected to its power source, it beeps and starts up very quickly, the OLED screen lights up and displays 000. In fact, the iron doesn’t start heating directly, it waits for you to give the command by briefly pressing the central button. This is useful for avoiding burns before you’re ready to solder. When the working temperature is reached, the iron emits a second beep. The menus are easy to use.
The device is extremely easy to use: the working temperature can be modified in 10°C steps by pressing the - and + keys. A brief press on the center button puts the iron into boost mode, which temporarily increases the temperature by a preset amount. The default boost is +50°C for one minute, but both the temperature difference and the duration can be set.
The PTS200 offers a wide range of settings. The menu is accessed by a long press on the center button. This gives access to a sub-menu dedicated to tips (renaming, calibration, etc.), another sub-menu dedicated to temperatures (standby and boost), and a third for timers (automatic standby and switch-off, etc.). Also note the Voltage sub-menu. The factory default setting is “20 V - 50%”. This works, but does not provide full heating power. For maximum performance, set to “20 V - 100%”.
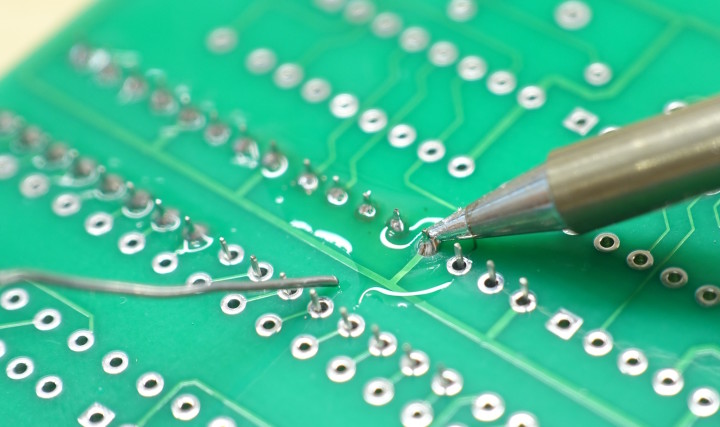
I used the PTS200 as my main iron for a few days, and it gave me satisfaction. I tested it on PCBs with fairly large ground planes, with good results. The power is sufficient; the tool does the job and gets out of the way. I used the BC2 (beveled) and B2 (conical) tips for most soldering jobs. The automatic stand-by function is very useful for preserving the life of the tips. It is possible to set the motion detection threshold, via the built-in accelerometer, to bring it out of standby. This is accessed via the Wake Threshold parameter in the Timer Settings sub-menu. This is useful, as in my case the iron tended to come out of standby unexpectedly, at the slightest parasitic vibration. Once the threshold has been raised to a slightly higher value, the system works properly. Conventional through-hole soldering poses no problem, of course.
As you’d expect, the iron is suitable for both right-handed and left-handed users. The reading direction of the display is adjustable via the “L/R Hand” parameter. The on-board accelerometer is not used for this purpose, and the screen direction does not change automatically when the iron is used upside down.
It is also possible to update the firmware by activating the appropriate mode in the menu; it then behaves as a mass storage device on a PC or Mac. All that remains is to follow the instructions on the official GitHub page to compile the firmware and transfer it to the iron. At the time of testing, my iron was already up to date with the latest version available (4.5.3).
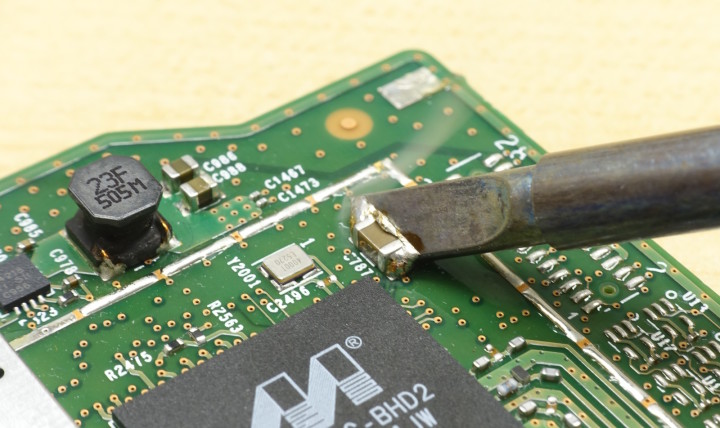
The iron is also very useful for working with SMD components, using the beveled tip for drag soldering (remember to use flux!). The fine conical tip is also useful for touch-ups, as is the knife tip for desoldering two sides of a component at once. The iron is versatile and does the job without breaking a sweat. The knife tip (K) is useful for SMD soldering, in this case to heat both sides of this capacitor at once.
Performance Testing
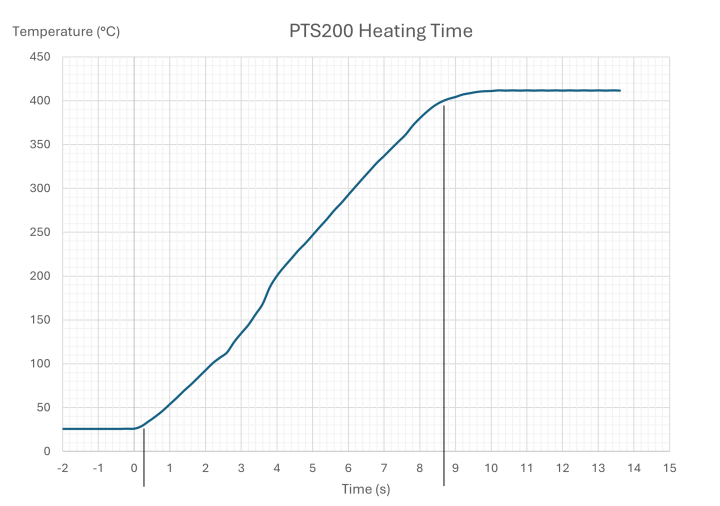
The theoretical maximum power of 100 W could only be achieved with an ideal 20 V power supply with no voltage drop under load, a cartridge with a resistance of 4 Ω and no cable losses. This, of course, is a bit unrealistic. The tips I received in the kit were measured with my DE-5000 and are about 4.2 Ω cold. At full power, I measured a current of 4.3 A. The power supply voltage remained stable at 20 V. This corresponds to a total power dissipation of 86 W. At this current, according to my measurements, the loss in the cable is of the order of 3 W. The power dissipated by the iron, neglecting the consumption of its on-board electronics, is therefore around 83 W. This is a very high output power, in line with many professional soldering stations. Thanks to this high power, the manufacturer claims a temperature rise from 30°C to 400°C in 8 seconds. Is this true? To find out, I recorded the temperature rise using a K thermocouple and an Arduino, using Excel to display the curve. This is heating very fast indeed: about 8 seconds between 30°C and 400°C, as promised.
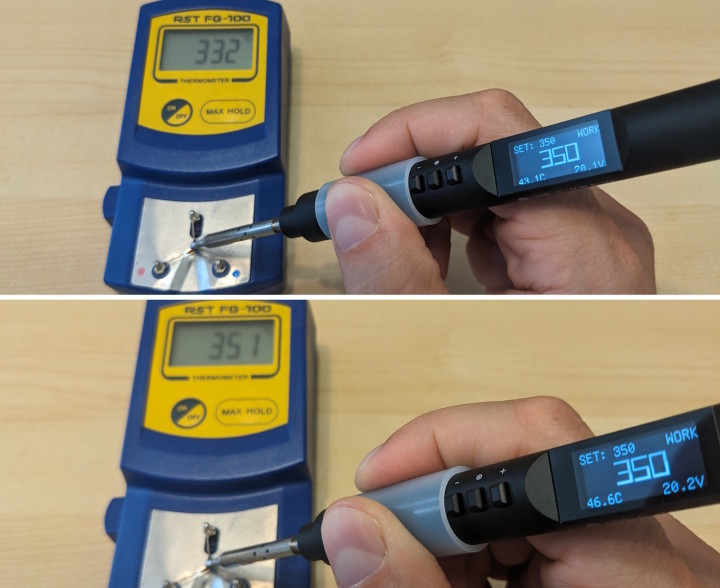
I measured 8.3 seconds. Extremely fast indeed; it’s the fastest iron I’ve tested so far. As for temperature accuracy, the out-of-the-box calibration on the BC2 tip was not perfect, but I was able to calibrate it easily using the Calibrate Tip command in the Tip Settings menu. Before and after tip calibration.
PTS200 Applications
The PTS200 soldering iron stands out as a very good choice due to its high power and robustness, making it suitable for a wide range of soldering applications, from SMD to large connectors. I liked its flexibility, with support for both various types of tips and several types of power supplies. Its nice cylindrical, machined aluminum design and attractive finish caps it all. Just be careful if you haven’t plugged the iron yet, avoid putting it on a table that’s not quite horizontal, as it tends to roll! Fortunately, plugging the cable prevents this. Ideal for general-purpose electronics, as a good alternative to a soldering station or as a secondary iron, it is also particularly useful for those needing a portable tool for field repairs. I haven’t had a chance to travel with it yet, but I imagine it would even be allowed on airplane luggage, unlike butane irons. The fact that the firmware is open-source is very promising; it’s unfortunate that the PTS200 is not yet compatible with IronOS, but it can also be appealing to those interested in exploring and modifying the firmware themselves, much like GitHub user “vortigont” did. All in all, I found the PTS200 very pleasant and easy to use. The complete kit, with a reliable power supply, high-quality flexible cable, and a comprehensive assortment of tips make it a valuable tool for anyone involved in electronics.
Subscribe
Tag alert: Subscribe to the tag DIY electronics and you will receive an e-mail as soon as a new item about it is published on our website!
Read full article
Hide full article
About Jean-François Simon
Jean-Francois Simon (Engineer, Elektor) has a longstanding passion for electronics and enjoys topics as varied as circuit design, test and measurement, prototyping, playing with SDRs, and more. He likes to create, modify and improve his tools and other systems... >>
Add a rating to this article
★★★★★
★★★★★
Page 1 / 1
Login
No account yet?Register for free!
Forgot password?
Please enter your email address. Instructions for resetting the password will be emailed to you now.


Discussion (2 comments)