“Radar” in Your Living Room: An Ultrasound-Based Radar Simulator
Sonar is like radar but uses sound waves instead of radio waves. Sound doesn’t allow for the range of radar signals, but it is a great alternative for simulating radar. With such a simulator, it is possible to understand how radar works and easily learn its basic principles. The Ultrasonic Radar Kit that we try in this article uses ultrasound to simulate a radar system.
Owning a radar station is the dream of many electronics hobbyists. Radar signals are fascinating and play an important role not only in military technology but also in civilian aviation. Similarly, ships and marine traffic guidance make heavy use of radar and if you have a reasonable recent car, it probably has one or more parking radars too. The police uses radar to check your speed. Radar has become indispensable for weather forecast (rain radar) and satellites use radar to observe the earth. In short, radars are everywhere.
Ultrasonic Radar?
Sonar is like radar but uses sound waves instead of radio waves. Sound doesn’t allow for the range of radar signals, but it is a great alternative for simulating radar. With such a simulator, it is possible to understand how radar works and easily learn its basic principles. The Ultrasonic Radar Kit that we try in this article uses ultrasound to simulate a radar system.
Subscribe
Tag alert: Subscribe to the tag Wireless & Communication and you will receive an e-mail as soon as a new item about it is published on our website!
The Ultrasonic Radar Kit
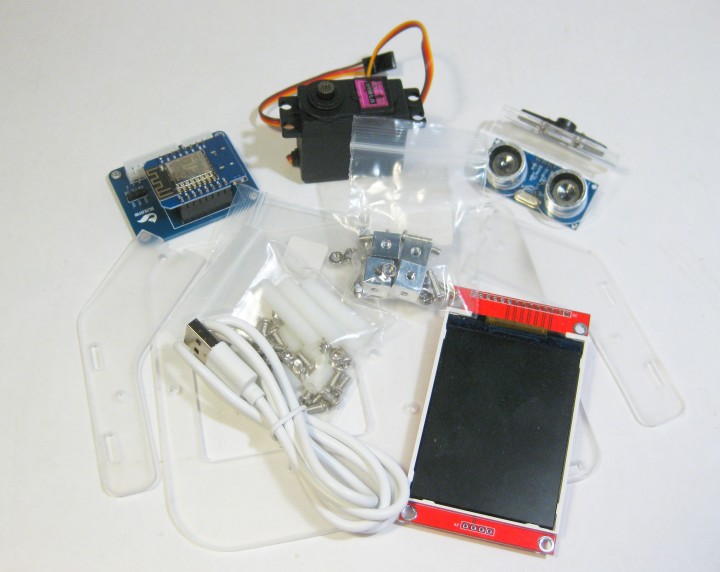
The ultrasonic radar kit contains all the components required to build a small simulated radar station:
mechanical elements made of transparent plastic
a high-quality model servo
an ultrasonic transducer module
a microcontroller with a breakout board
a USB power supply and a matching USB cable
all necessary cables, screws, nuts, and spacers.
Figure 1: Contents of the Ultrasonic Radar Kit
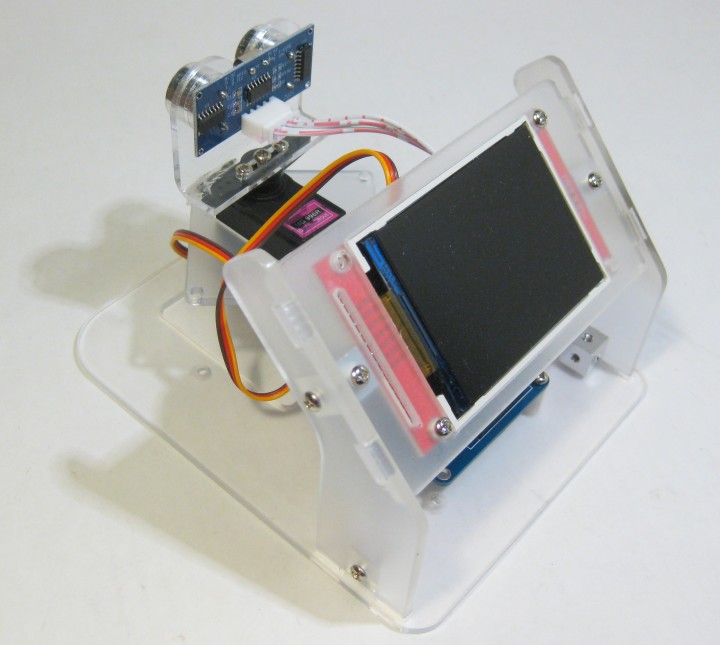
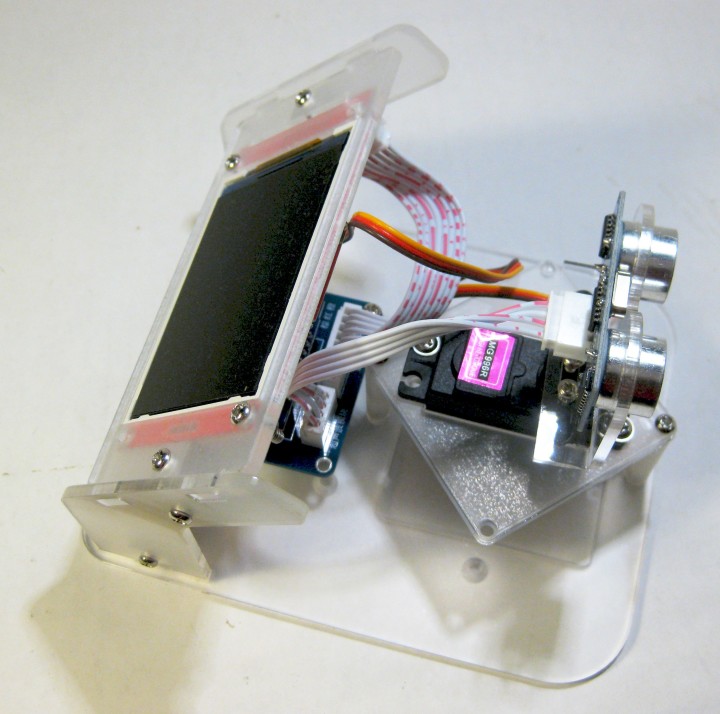
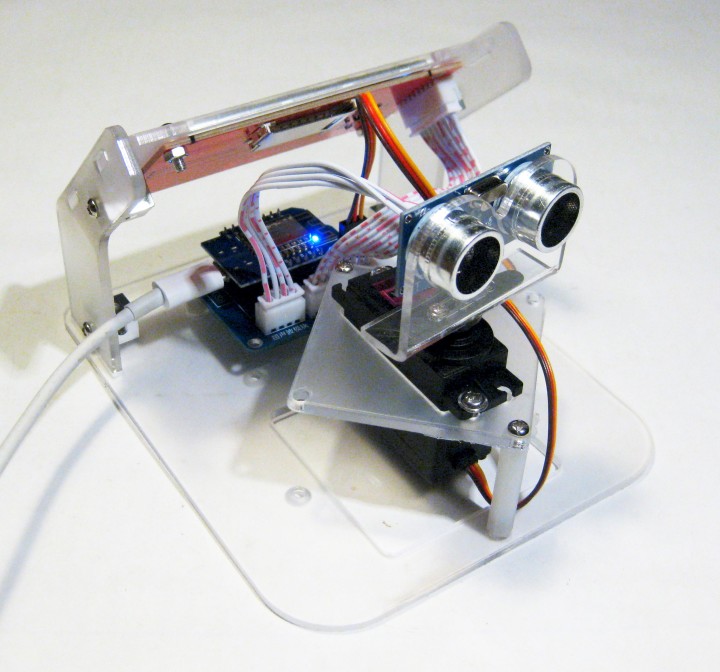
The kit assembly is straightforward and should be manageable even for beginners. Unfortunately, a detailed instruction manual is not provided. However, the cables connect to reverse-polarity-protected headers, reducing the likelihood of errors. The mechanical assembly is also mostly intuitive. Figures 2 to 5 display the fully assembled radar station. Figure 2: The assembled “radar” station. Figure 3: Top view Figure 4: The radar screen.Figure 5: Front view with the ultrasonic transducer module.
Operation and Experiments
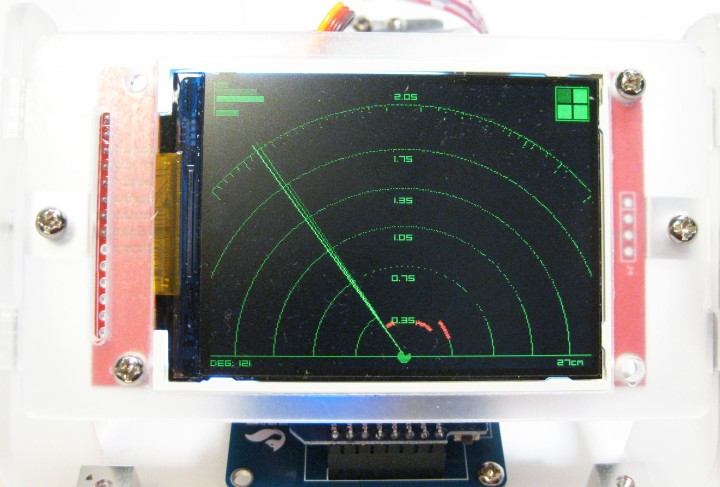
Once the radar station is fully assembled, it can be connected to the power adapter and USB-C cable included in the kit. If everything is set up correctly, a radar-like image will appear on the screen. No programming is required. The servo motor will sweep from left to right and back, while the ultrasonic transducer module scans the environment. Figure 6 illustrates the radar station in action.
Measuring Distance with The Utrasonic Radar
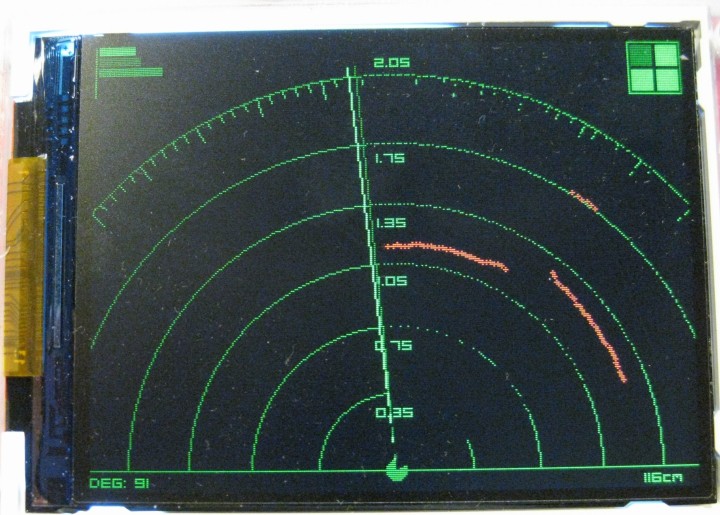
On the screen, the scanning beam is shown in green, with distance reference rings. Detected objects are marked as red dots (see Figures 4, 6, and 7). At this point, you can begin conducting interesting experiments. One key parameter for any radar station is the range. The included ultrasonic transducer module has a range of at least 4 meters, but the maximum distance shown on the display is 2.05 meters. Larger objects are detected at this distance, but objects closer by, such as at 1.75 meters, are displayed more clearly (see Figure 6). Figure 6: Testing the longer ranges.
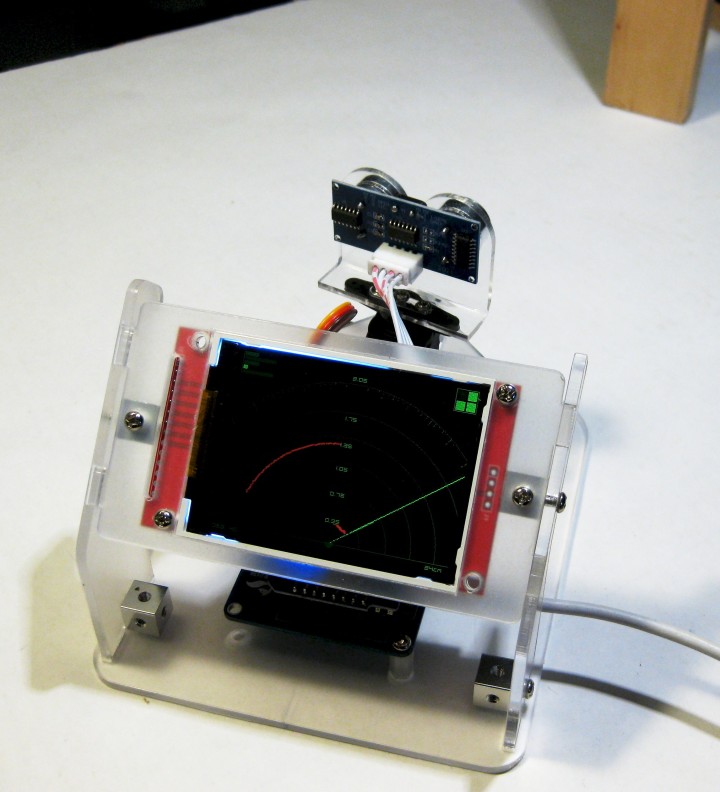
The system's resolution is surprisingly high. Depending on the distance, objects as small as two to four centimeters in width can be detected without any problems. The radar station only struggles with extremely small objects, such as those the size of a pencil's diameter. The following figure illustrates the detection of a wooden strip approximately 4 centimeters wide. Figure 7: Object detected!
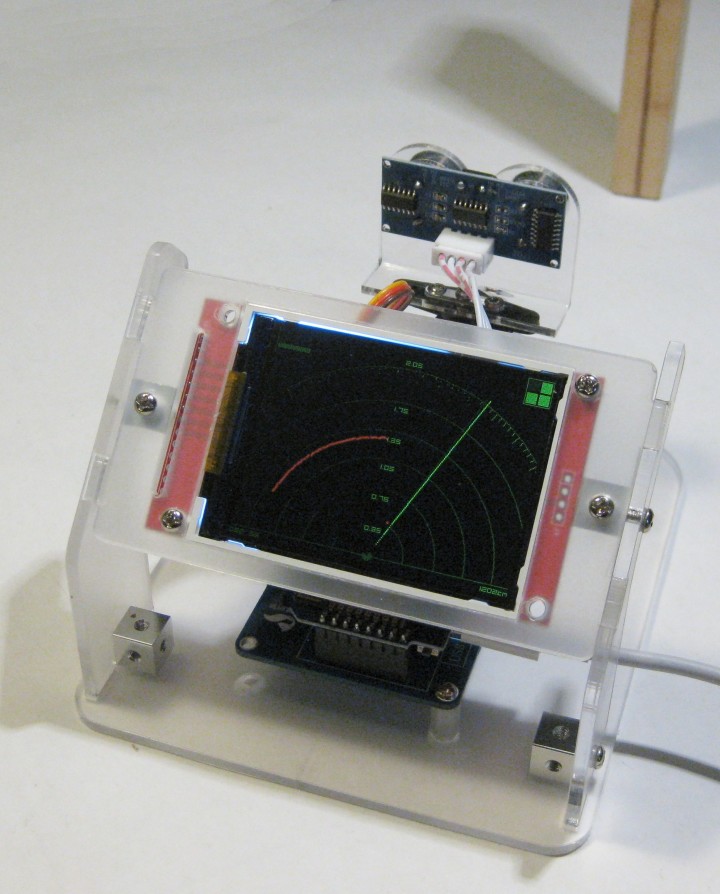
Smaller objects become increasingly difficult to detect and eventually appear as just a single red dot (see Figure 8). For instance, pencils can only be detected up to a distance of a few centimeters. Figure 8: Detection of smaller objects.
Now that we know what it is capable of, we can look at potential applications. It can be employed for educational experiments to demonstrate how sonar and radar work, or for basic applications, such as detecting smaller targets like model aircraft or ships. Additionally, more practical uses, such as room monitoring and surveillance, are also feasible.
Pros & Cons
The kit has several strong points:
It includes all necessary components, such as USB cables and power adapters.
The assembly process is straightforward, with reverse-polarity-protected connectors that minimize wiring mistakes.
The controller comes preloaded with complete software, so no complex programming is needed.
However, there are also a few drawbacks to consider:
A detailed assembly manual is not provided.
An operating manual with background information would be beneficial.
The controller’s source code is not publicly accessible.
Subscribe
Tag alert: Subscribe to the tag Radar and you will receive an e-mail as soon as a new item about it is published on our website!
Conclusion
The kit allows for the assembly of a small, aesthetically pleasing ultrasonic radar station with an integrated display. Simple experiments can be conducted to understand the functionality and technical fundamentals of radar technology in a hands-on manner.
With the pre-programmed controller, even beginners can easily set up this station. The experiments that can be conducted include simple target detection applications as well as monitoring smaller rooms. The already loaded code works flawlessly; however, it would certainly be nice for advanced users to have the option to modify or extend it.
Going Further
Custom programming of the controller, such as through the Arduino IDE, is certainly feasible. However, it requires some independent learning to familiarize oneself with the appropriate programming techniques. Fortunately, there is ample information available online to assist with this process. Once you've gotten started, there are no significant barriers to exploring more advanced and exciting applications of the radar station.
Read full article
Hide full article
Add a rating to this article
★★★★★
★★★★★
Page 1 / 1
Login
No account yet?Register for free!
Forgot password?
Please enter your email address. Instructions for resetting the password will be emailed to you now.


Discussion (0 comments)