Assembling the Elektor Sand Clock Kit
January 10, 2024
on
on

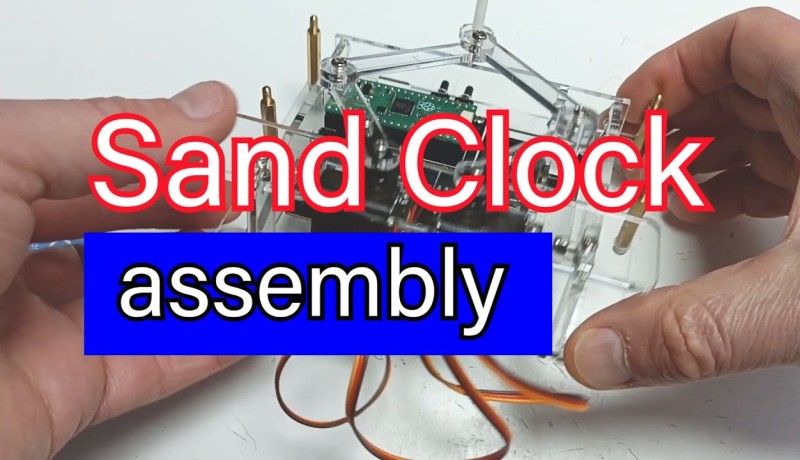
How about building your own unique timepiece? Check out this video and discover the Elektor Sand Clock kit. This step-by-step tutorial offers an engaging and easy-to-follow guide to assemble your Raspberry Pi Pico-based sand clock.
Starting with the basics, you'll learn about the required tools, and begin by testing the electronics. This involves plugging the Raspberry Pi Pico onto the baseboard, plugging the servo connectors, downloading software and establishing communication with the module from the Arduino IDE. All of this is pretty straightforward and the tutorial is very detailed.
The video then guides you through interfacing the clock with a computer, using the built-in serial commands to calibrate the clock and set up the time. Fortunately, this is a one-time process, as the settings are stored in an EEPROM and the time is kept by a battery backed-up RTC. All that's left to do is admire the result!
Whether you're new to electronics or a more seasoned hobbyist, building this clock kit promises a rewarding and educational experience. Enjoy the video below:
Starting with the basics, you'll learn about the required tools, and begin by testing the electronics. This involves plugging the Raspberry Pi Pico onto the baseboard, plugging the servo connectors, downloading software and establishing communication with the module from the Arduino IDE. All of this is pretty straightforward and the tutorial is very detailed.
Subscribe
Tag alert: Subscribe to the tag Raspberry Pi and you will receive an e-mail as soon as a new item about it is published on our website! Building the Sand Clock
Progressing further, you'll build all the mechanical parts. The clock is made of laser-cut acrylic sheets that are assembled together with screws and nuts. The tutorial guides you through the whole process, with attention to detail, so you can avoid mistakes during assembly, in particular with some asymmetrical parts that must be oriented correctly. Then, the PCB and the servos can be mounted inside the acrylic chassis. All in all, a smooth assembly process!The video then guides you through interfacing the clock with a computer, using the built-in serial commands to calibrate the clock and set up the time. Fortunately, this is a one-time process, as the settings are stored in an EEPROM and the time is kept by a battery backed-up RTC. All that's left to do is admire the result!
Whether you're new to electronics or a more seasoned hobbyist, building this clock kit promises a rewarding and educational experience. Enjoy the video below:
Explore Further!
View other great educational videos and tap into the knowledge of experts by checking out our additional content on our Elektor YouTube channel and our Elektor Industry Youtube channel.Stay Informed
Subscribe to our Elektor newsletter to receive a consistent flow of expert tech knowledge and interesting perspectives. Subscribe
Tag alert: Subscribe to the tag Raspberry Pi Pico and you will receive an e-mail as soon as a new item about it is published on our website! Read full article
Hide full article


Discussion (1 comment)
cvdo 3 months ago
I have Arduino 2.3.4 installed, the Raspberry Pi Pico Board and installed the RTClib. So far so good.
First problem is error message:
Compilation error: EEPROM.h: No such file or directory
I found EEPROM.h and EEPROM.cpp on https://github.com/earlephilhower/arduino-pico/tree/master/libraries/EEPROM/src and copied those two files into the project directory. I changed <EEPROM.h> into "EEPROM.h" and that was first hurdle taken.
Second problem is that EEPROM.h includes pgmspace.h:
#elif defined ARDUINO_RASPBERRY_PI_PICO
#include <pgmspace.h>
which results in the error message: fatal error: pgmspace.h: No such file or directory
This is apparently a known problem in Arduino and according to some can be solved (patched) by including from the avr directory (which seems strange to me)
#include <avr/pgmspace.h>
Compiling now gives the following error messages:
C:\Users\info\OneDrive\Documenten\Arduino\Sandclock\sandclock_V1.4\EEPROM.cpp: In member function 'bool EEPROMClass::commit()':
C:\Users\info\OneDrive\Documenten\Arduino\Sandclock\sandclock_V1.4\EEPROM.cpp:121:10: error: '__isFreeRTOS' was not declared in this scope
if (!__isFreeRTOS) {
^~~~~~~~~~~~
UPDATE.
I have moved the EEPROM.h and cpp to arduino/libraries/EEPROM and now I have other error messages, which come from the sandclock program itself:
C:\Users\info\OneDrive\Documenten\Arduino\Sandclock\sandclock_V1.4\sandclock_V1.4.ino:668:13: error: 'class arduino::UART' has no member named 'setRX'
Serial1.setRX(UART_RX);
^~~~~
C:\Users\info\OneDrive\Documenten\Arduino\Sandclock\sandclock_V1.4\sandclock_V1.4.ino:669:13: error: 'class arduino::UART' has no member named 'setTX'
Serial1.setTX(UART_TX);
^~~~~
C:\Users\info\OneDrive\Documenten\Arduino\Sandclock\sandclock_V1.4\sandclock_V1.4.ino:694:59: error: no matching function for call to 'Servo::attach(int, int, int, int)'
sv_left.attach(PIN_SERVO_LEFT,SV_MIN_US,SV_MAX_US,1500);
^
In file included from C:\Users\info\OneDrive\Documenten\Arduino\Sandclock\sandclock_V1.4\sandclock_V1.4.ino:301:0:
C:\Users\info\AppData\Local\Arduino15\libraries\Servo\src/Servo.h:108:11: note: candidate: uint8_t Servo::attach(int)
uint8_t attach(int pin); // attach the given pin to the next free channel, sets pinMode, returns channel number or 0 if failure
^~~~~~
Now it's time for me to give up. Apparently the EEPROM library has some dependencies which have been broken? please help!