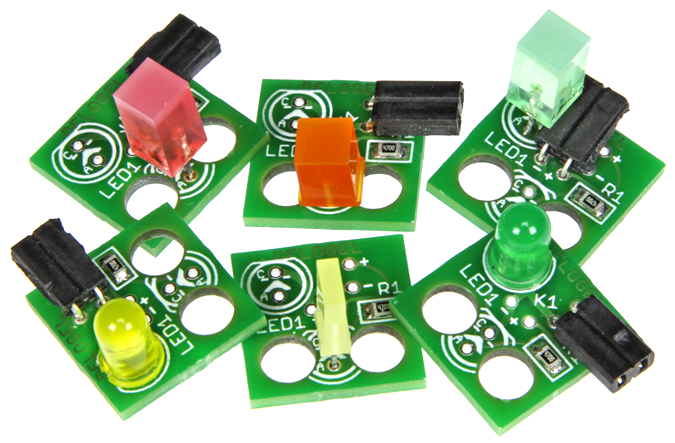
Post Project 59: Elektorized Lego LED
To prevent it flashing intensely, just once, an LED needs a current limiting resistor. The footprint for it is on the PCB, of course, together with the LED. There is not a lot of room, so it’s an SMD resistor in an 0805 package. Its default value is 470 ohms, but the actual value of course depends on the supply voltage, the color of the LED and the brightness required. If you are going to experiment a lot then you may opt to put the resistor somewhere else and connect it as an external part.

Interesting fact: the thickness of standard 1.6-mm FR4 PCB material with varnished copper on both sides equals the height of a Lego brick knob.

Interesting fact: the thickness of standard 1.6-mm FR4 PCB material with varnished copper on both sides equals the height of a Lego brick knob.
Component List
Resistors
R1 = 470Ω, SMD 0805, 5%, 0.1W (see text)
Semiconductor
LED1 = LED, 7.8x7.8mm (see text)
Miscellaneous
K1 = 2-way pinheader socket, 90 degrees angled, 0.1” pitch
PCB # 150244-1 v1.1 from Elektor Store
Module 150244-71 Build Upons LED (lego compatible) LunchboxElectronics.com
Resistors
R1 = 470Ω, SMD 0805, 5%, 0.1W (see text)
Semiconductor
LED1 = LED, 7.8x7.8mm (see text)
Miscellaneous
K1 = 2-way pinheader socket, 90 degrees angled, 0.1” pitch
PCB # 150244-1 v1.1 from Elektor Store
Module 150244-71 Build Upons LED (lego compatible) LunchboxElectronics.com
Read full article
Hide full article


Discussion (0 comments)