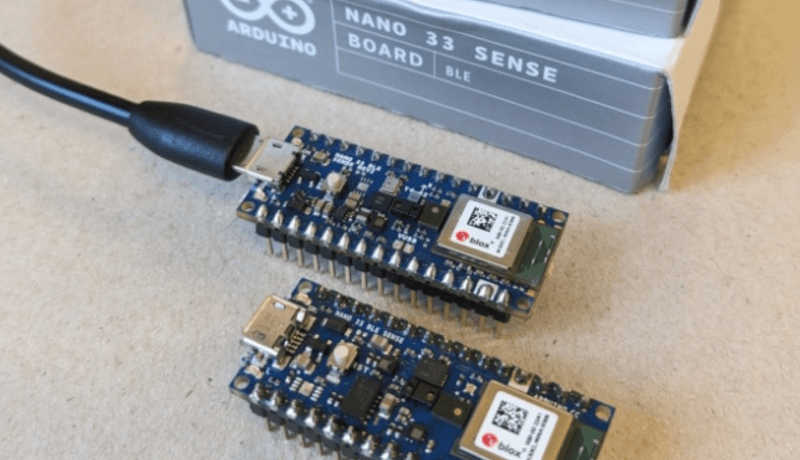
With TensorFlow Lite for Microcontrollers, you can run machine learning models on resource-constrained devices. Want to learn more? You can use it with Edge Impulse for speech recognition on an Arduino Nano 33 BLE Sense.

AI on the Edge

Artificial intelligence (AI) and machine learning (ML) are the new buzzwords, and sometimes theyre being misused interchangeably. Facebook, Amazon, Google and many others are using ML systems to provide you with content tailored as closely as possible to your tastes and habits. ChatGPT is another example of a very spectacular and popular service using ML. What these companies have in common is access to servers with huge computing power to train the models by processing gigantic volumes of data, and to respond fluidly to queries from a large number of users.

This is changing, however, with the emergence of AI “on the edge.” Edge AI refers to the deployment of artificial intelligence algorithms and processing at the edge of the network, which means closer to the data source and far from a server, enabling real-time data analysis and decision-making with reduced latency and bandwidth usage. Although the notion of network is often put forward, it also works without any network at all — for example, on a modest microcontroller board, which is not necessarily connected to the Internet.

Subscribe
Tag alert: Subscribe to the tag Microcontrollers and you will receive an e-mail as soon as a new item about it is published on our website!

TensorFlow Lite for Microcontrollers

An interesting development occurred in this field a few years ago with the appearance of TensorFlow Lite for Microcontrollers (TFLite Micro). It is a lightweight version of TensorFlow, an open-source machine learning framework developed by Google, designed to run machine learning models on microcontrollers, enabling ML applications on small, resource-constrained devices. So, can you run TFlite Micro on your Arduino board? Well, yes, but not all Arduinos. It is written in C++ 17 and requires a 32-bit platform, as well as a few kilobytes of RAM. It can be used with many Arm Cortex-M microcontrollers, and it can also be used with ESP32. The complete list of compatible platforms is available here. So, while the venerable Arduino Uno isn’t up to the task, the Arduino Nano 33 BLE Sense (Figure 1) can be used. This is a powerful board, and it’s actually pretty ideal for playing around, as it is already packed with sensors: a 9-axis inertial sensor, humidity, temperature, light color and light intensity sensor, a pressure sensor and a microphone.
 

Figure 1: Arduino Nano 33 BLE Sense.

Although this Arduino board is powerful, its still not powerful enough to train the model directly on the board. In most microcontroller-based ML projects, the usual method is to prepare the source data and train a model on a powerful machine, such as your PC or a remote server. This results in the creation of a binary model file, which needs to be converted later into a C-language header file. Finally, an Arduino program can be created using the functions provided in the TFLite Micro library and compiled with the Arduino IDE.

For those who like to get their hands dirty and do everything themselves, have a look at the official TensorFlow Lite documentation . I also found interesting articles published by DigiKey. They recommend using a Linux PC with Python, then installing, among others, TensorFlow, Keras, Anaconda, Jupyter Notebook and others. Another solution is to run Python code in Google Colab, a free cloud-based platform provided by Google that allows users to write and execute Python code in an online environment. As a novice, I found that the TensorFlow documentation was hard to follow. It also requires a good understanding in neural networks to be able to do anything functional, which can be discouraging.

Subscribe
Tag alert: Subscribe to the tag Arduino and you will receive an e-mail as soon as a new item about it is published on our website!

Simple Examples

Tutorials on the Internet often show very similar things, some of which lack a little practical utility to be really stimulating. For example, it is often shown how to train a model to produce an output value corresponding to an approximation of the sine of the input value. This uses, of course, the pre-calculated values of the sine function as a training dataset. Thus, once properly trained the model can give an approximate value of sin(x) at its output, given an input value x between 0 and 2π and without using a mathematically implemented sine function. Of course, this is probably the most absurd and impractical way of calculating a sine, especially on a microcontroller where computing resources are limited.

Another, more useful, example is voice recognition. In this way, the microcontroller can listen to whats going on in its environment using a microphone, discern a few words (e.g., yes and no, or cat and dog, etc.) and trigger various actions. For the purposes of this article, written by a beginner for beginners, Id like to keep things simple. Ill show the use of speech recognition on an Arduino Nano 33 BLE Sense.

Subscribe
Tag alert: Subscribe to the tag Embedded & AI and you will receive an e-mail as soon as a new item about it is published on our website!

Speech Recognition

For this, I’ll be using the Google Speech Command Dataset. It contains 65,000  one second long samples, each clip featuring one of thirty different words spoken by thousands of different people. To train the model, I will use Edge Impulse . Edge Impulse is a platform that enables developers to create, train, and deploy machine learning models on edge devices like microcontrollers, by focusing on ease of use, without requiring too much programming. It supports TensorFlow Lite for Microcontrollers internally and provides an easy way of deploying the model and TFLite library on the Arduino board itself, which is very convenient.

To get started, youll need some audio samples. Create a folder, which will be your working folder. Ive called mine tflite_elektor. Download the Google Speech Command Dataset . Make sure you have a good Internet connection, as the file is 2.3 GB in size. As its a file with a .tar.gz extension, its compressed twice. Use 7-Zip or equivalent software (I dont recommend the Windows built-in utility for handling such large files) to obtain the .tar file inside, then decompress its contents. The result is a speech_commands_v0.02 folder. Place this folder in your working folder. You can rename the speech_commands_v0.02 folder to give it a simpler name, in my case: dataset.

Preparing Data

Next, you need to prepare the data. For this, I suggest using the excellent Python script developed by Shawn Hymel, which he generously offers under open-source license. Download the files dataset-curation.py and utils.py from his GitHub repository and save them in your working folder. This script requires the _background_noise_ folder inside the dataset to be separated from the keywords. So drag and drop this folder outside dataset to place it in your working folder. You can also rename it: noise. Your working folder now contains the two folders dataset and noise as well as the two Python files (Figure 2)

Figure 2: The files and folders before running the Python script.

The Python script makes it much easier to use the huge amount of data contained in Google’s dataset. Besides that, as you’ll see later, it is flexible. You could use it with datasets other than this one, and also with audio files you’ve recorded yourself. It would be impractical to upload several gigabytes of files to Edge Impulse’s servers. To begin with, choose one or more keywords, which will be the target words that the Arduino will be responsible for detecting. For this example, Ive chosen the word zero. The script will create a set of folders: one folder for each target keyword, so in this case a single folder named zero, as well as a _noise folder, containing random noise, and an _unknown folder containing random words other than the target keywords.

The script mixes background noise with keyword samples to enhance model robustness. First, it creates the needed folders, then it extracts smaller noise clips from background noise segments. It then mixes these noise clips with samples of target keywords and non-target keywords. This will improve the models resilience to background sounds and create a curated dataset, much smaller in size (about 140 megabytes) that Edge Impulse can easily work with.

Subscribe
Tag alert: Subscribe to the tag python and you will receive an e-mail as soon as a new item about it is published on our website!

Working with Python

The code has been tested with Python 3.7. To manage several different Python environments with different versions, with different packages installed, you can use Anaconda , which makes it easy to create a clean installation of the desired version. Here I create a new environment called jf:

conda create -n jf python=3.7

Next, youll need to install the librosa, numpy and soundfile packages:

python -m pip install librosa numpy soundfile

The shutil package is also required, but is normally included with Python 3.7.

From Anaconda prompt or from your system’s command line interface, navigate to your working directory and run the script using the command:

python dataset-curation.py -t "zero" -n 1500 -w 1.0 -g 0.1 -s 1.0 -r 16000 -e PCM_16 -b "./noise" -o "./keywords_curated" "./dataset"

And wait a few minutes for it to complete (Figure 3).

Figure 3: The Python script running.

Next, a quick look at the arguments taken by the script:

-t is for target keywords. Here, Ill use -t "zero".

-n is the number of output samples per category. 1500 is a good starting point.

-w and -g are the volume levels of the spoken word and of the background noise, respectively. -w 1.0 -g 0.1 are recommended values.

-s and -r are the sample length (1 s) and resampling rate (16 kHz). Use -s 1.0 -r 16000.

-e is the bit depth, here we use 16-bit PCM.

-b is the location of the background noise folder, -o is the output folder and finally, the last unlabeled argument is the list of input folders. Here, it is the dataset folder.

When the script is done, it should have created a keywords_curated folder containing three folders: _noise, _unknown and zero (Figure 4).

Figure 4: After the Python script has finished running.

Importing to Edge Impulse

The next step is to import these files to Edge Impulse. Go to their website and create an account if you dont already have one. After logging in, create a new project. In the left menu, navigate to Data Acquisition, then click Add Data and Upload Data. Tick Select a folder and pick the first folder, such as _noise.

Make sure to check the option Automatically split between training and testing. This way, Edge Impulse will first use 80% of the uploaded samples to train the model. Then, we can test the performance of the trained model by asking it to process data it hasn’t seen before; the remaining 20% are reserved for this purpose.

Also, check the option Label: infer from filename so that Edge Impulse recognizes, by the file name, which samples contain the word(s) to be recognized as well as the ones containing noise. Finally, click the Upload data button in the lower right corner and wait for the transfer to complete. Repeat for the two remaining folders _unknown and zero.

After the upload is complete, return to Data Acquisition to view all the uploaded samples. Ensure that approximately 20% of your files are in the test set, with the remainder in the training set, and verify that the labels were correctly read (Figure 5).

Figure 5: Audio samples are correctly stored by Edge Impulse.

Next, it is needed to add a Processing Block. In Edge Impulse, it is a component used to transform raw sensor data into a format suitable for machine learning model training and inference. It includes many complex things in a simple block, such as the preprocessing of raw input data, extraction of features (see below), optional steps such as Fourier transforms, etc., and finally, it outputs the data in a format compatible with the next steps in the ML chain.

In general Machine Learning terms, features are distinct, quantifiable attributes or properties of the observed data. Here, the features to be extracted are the Mel-frequency cepstral coefficients (MFCCs), which are commonly used in audio signal processing and speech recognition. They represent the short-term power spectrum of a sound signal on a nonlinear mel scale of frequency.

Figure 6: Setting up the “impulse”, or model.

Thus, go to Impulse Design and click the Add a Processing Block button. Select the first option, Audio (MFCC), by clicking Add on the right. Then, click the Add a Learning Block button and choose the first option, Classification, which is the recommended one. Finally, click Save Impulse on the right (Figure 6).

Training of the Model

In the left menu, under Impulse Design, select MFCC. Navigate to the Generate Features tab and click on Generate Features (Figure 7). Wait for the feature generation to complete. Once done, go to the Classifier section, located just below MFCC in the left menu. In the top-right corner, click on target and select Arduino Nano 33 BLE Sense. You can adjust the neural network parameters, but the default settings are, not surprisingly, better than anything I could have done myself.

Figure 7: The Generate Features section, where audio data is processed.

Note that you can edit the neural network using their graphical tool or switch to expert mode via the pop-up menu if you are familiar with Keras. For this example, I will simply click Start Training at the bottom of the page to begin training the model on the data. When training is finished, review the results in the Model frame at the bottom right. You will see a general accuracy score, and 90% is considered quite good; here I got 92.8% (Figure 8).

Figure 8: The model has finished training.

There is also a matrix, called a confusion matrix, that checks the models performance. The rows represent the actual labels, and the columns represent the predicted labels. The numbers along the diagonal, where the predicted label matches the actual label, should be much higher than the other values. Here the diagonal shows 98.8%, 87% and 92.8%, which should be good enough. A more difficult test is to evaluate the model by providing it data it hasn’t seen before. For this, head to the Model testing section in the left menu. Click Classify All and let that run until it finishes. In the Results frame at the bottom, the score is a few percent lower than the score before, but this is to be expected. Here I got 90.56%, which is a good sign (Figure 9).

Figure 9: Testing the model against unseen data.

Deployment for Arduino

Now, let’s go to the Deployment page. Edge Impulse offers several options to package the model: a generic C++ library for general microcontroller use, Cube MX for STM32 parts, WebAssembly for JavaScript environments and many more. Click on Search deployment options and select Arduino library. Then, click the Build button at the bottom of the page. A few seconds later, your browser will then download a ZIP file with the Arduino library.

I’m using the Arduino IDE version 1.8.19. Open the Arduino IDE and connect your Arduino Nano 33 BLE Sense to your computer. If it’s the first time you’re using your Nano 33 BLE, the IDE will suggest you download the Arduino Mbed OS Nano Boards package, which is indeed required. Then you can add the library using the usual technique, clicking Sketch, Include Library, Add .ZIP Library and selecting the .zip file you just downloaded from Edge Impulse. Then, go to File, Examples and locate the library you just installed. You might need to reload the Arduino IDE for it to appear. The name should match your Edge Impulse project name, so its tflite_elektor_inferencing for me.

Note that there are two separate folders, nano_ble33_sense and nano_ble33_sense_rev2 (Figure 10). The microphone_continuous example which is used here only appears in the first one, but I’ve tested it with success on both Rev1 and Rev2 hardware. On the other hand, you’ll probably need to pick the correct version depending on the board you have if you want to play with the other example sketches which use the built-in accelerometer. Open the microphone_continuous example.

Figure 10: Using the built-in microphone_continuous example.

Optionally, you can review the example sketch to understand how everything is set up and which functions are called for inference. In the loop, the microcontroller waits for the microphone buffer to fill, then calls the run_classifier_continuous function to run inference with the neural network on the recorded audio data. The results will be printed to the Serial Monitor only once per second. The code in the provided library is sometimes not easy to follow, but it can be a rewarding exercise to try and see what’s under the hood.

Subscribe
Tag alert: Subscribe to the tag Edge Impluse and you will receive an e-mail as soon as a new item about it is published on our website!

Flashing the Board

In the Tools menu of the Arduino IDE, make sure that the correct board (Nano 33 BLE Sense) is selected, as well as the right COM port, which you can check using the Device Manager if you’re using Windows. Click the Upload button and wait! Keep in mind that compiling the project takes a while because the library, which contains the TensorFlow Lite functions for inference as well as the model created on Edge Impulse in binary format, is quite substantial. Once its finished, youll see it uses about 171 kilobytes of flash and approximately 47 kilobytes of RAM for global variables.

It Works!

Now open the Serial Monitor to watch the output. Every second, it gives three numbers which are the probabilities that a given pattern has been detected, among: random noise, a word which is not zero and finally the word zero. Figure 11 is an example where nothing special happens. If I say the word “zero” relatively close to the Arduino board, the third score reaches a very high value, almost 100% (Figure 12).

Figure 11: The Arduino is listening to random noise in the room.

Not bad! Now, the next step would be to make the Arduino board make something useful with that information. I’m sure you will find interesting applications to be able to send voice commands to Arduino-powered gadgets. The process described above and the Python script designed by Shawn Hymel can also be used to detect more than one word. The maximum number will be limited by storage space in the Arduino flash and the computing power available. In the code, the #define EI_CLASSIFIER_SLICES_PER_MODEL_WINDOW 4 line tells us that each one second window is divided in four 250-ms slices, and the output in the Serial Monitor tells us that the time used by the sketch is 76 + 6 = 82 ms per 250 ms slice, which is approximately equal to 33% CPU usage. There is some processing power left available to add your own program.

Figure 12: The word was detected with excellent certainty.

Going Further

For the sake of simplicity, I used one of the words already available within the Google Speech Command dataset. To train a model to spot a word that is not part of this set, you have to record a large number of audio samples with the word being spoken, preferably by a large number of people with different voices, ages and intonations. While the Google set contains thousands of samples per word, when recording custom words yourself, fifty to one hundred samples could be a good start. Of course, I just scratched the surface with this simple example. Exploring deeper is highly recommended for those interested! Do you have an idea in mind for a project using ML?

A Complex Field, and Simpler Options

The article, "TensorFlow Lite on Small Microcontrollers" (240357-01), appears in Elektor November/December 2024.

Subscribe
Tag alert: Subscribe to the tag TensorFlow and you will receive an e-mail as soon as a new item about it is published on our website!