The Arduino-controlled Drawing Robot is a low-cost pen plotter that can be used to make small drawings on a piece of paper. It is based on an Arduino Nano board with a Bluetooth extension module, allowing it to be controlled from an Android smartphone. It comes as a kit of parts that you must assemble yourself.
The Arduino-controlled Drawing Robot is a low-cost pen plotter that can be used to make small drawings on a piece of paper. It is based on an Arduino Nano board with a Bluetooth extension module, allowing it to be controlled from an Android smartphone. It comes as a kit of parts that you must assemble yourself. A manual is not included in the kit, but you can download it from the internet. Assembling the kit is not too complicated, as long as you respect the orientation of the parts.
Similar to the Sand Clock
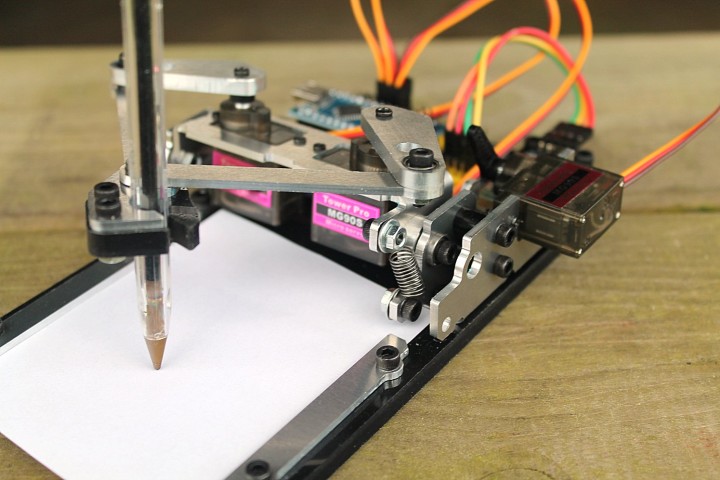
The drawing robot works in the same way as the Elektor Sand Clock, meaning that it has a pantograph to hold the pen instead of a head moving on separate X- and Y-axes. This allows for a simpler mechanical design using servos instead of motors and belts, but the mathematics to position the pen is much more complicated. Luckily, this is handled by the Arduino Nano.
The kit comes as a large plastic bag containing several smaller plastic bags, each containing different parts. One of the bags contains an impressive number of screws, washers and nuts, but, as I found after I had finished assembling my kit, almost half of those are not used. The assembled drawing robot.
The Drawing Robot Is Made of Strong Parts
The base of the drawing robot is a 5.5-mm-thick black machined acrylic plate measuring 160 mm by 95 mm. There are two other acrylic parts: the pen holder and the Bluetooth module support. The pantograph, i.e. the arm that holds the drawing pen, and the servo brackets are all made from 2-mm-thick aluminum. Most of the screws are of the hexagonal type and a tool is included. There are, however, also some tiny Philips-head screws are used, and for those you’ll need to bring your own screwdriver.
When you closely follow the build steps in the manual, assembling the kit is quite straightforward. Which type of screw goes where and how many you need is clearly indicated. The parts are well machined and everything fits nicely. However, the aluminum parts have sharp edges and can scratch the surface you are working on. Similarly, certain screws stick about half a millimeter out of the bottom side of the baseplate and can scratch too. Rubber adhesive feet to prevent this are not included.
Subscribe
Tag alert: Subscribe to the tag Arduino and you will receive an e-mail as soon as a new item about it is published on our website!
Connect the Pen Up/Down Servo
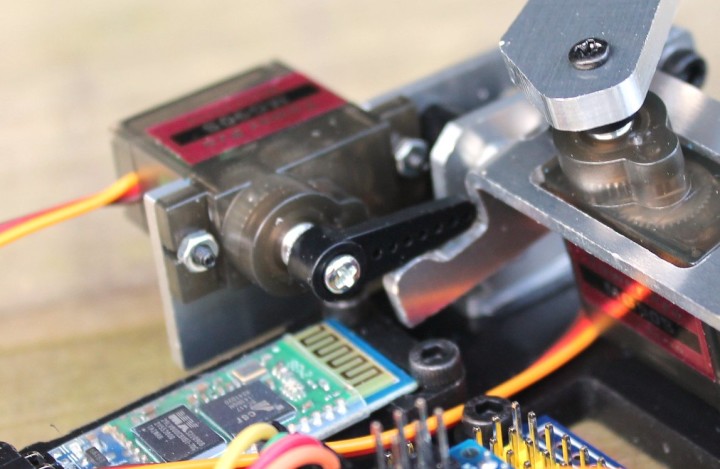
After having gone through all the assembly steps, the manual declares the drawing robot ready for use. However, in my case the head assembly was not yet connected or attached to anything so the robot could not draw. It turns out that this step is missing in the manual, or at least I didn’t see it. If, like me, you missed it, here is what you must do: the plastic arm that you mount on the horizontal servo on the side of the robot must be in the same vertical plane and right above the lever that sticks out the rear side of the pantograph servo bracket. For me this meant that the plastic arm should not be pushed all the way onto the horizontal servo, otherwise it could not push the lever down. The horizontal servo pushes the lever down to lift the pen up. A spring, assisted by gravity, pulls the pen down when drawing. The missing link: this is how the pen-up servo pushes the lever.
The Drawing Robot Comes Preprogrammed
The Drawing Robot comes preprogrammed, meaning that when you’re done with building it, you can immediately try it. Well, almost immediately. You need to install an app first on a suitable Android phone. This app is contained in the download as an APK file, but it is not available in the Play Store. Therefore, to install it, you must allow your phone to install apps from unknown sources. How to do this depends on your phone. Luckily, the drawing app is not one of those dubious apps full of publicity and cloud connections, it is just a simple canvas-to-serial-drawing-instructions converter. And, as a matter of fact, it is a bit too simple.
Pairing the Bluetooth App
Connecting the phone to the drawing robot requires pairing with the Bluetooth module first. The app doesn’t do this for you. This means that you must look for a Bluetooth device named “HC-06”. My phone then asked for a PIN code to complete pairing and helpfully suggested “0000” or “1234”. It was the latter that did the job. Once paired, you can select the device in the drawing app. Now, as soon as you draw something with your finger on the canvas, the drawing robot starts to copy it. It’s not very fast and not super precise, but it does the job.
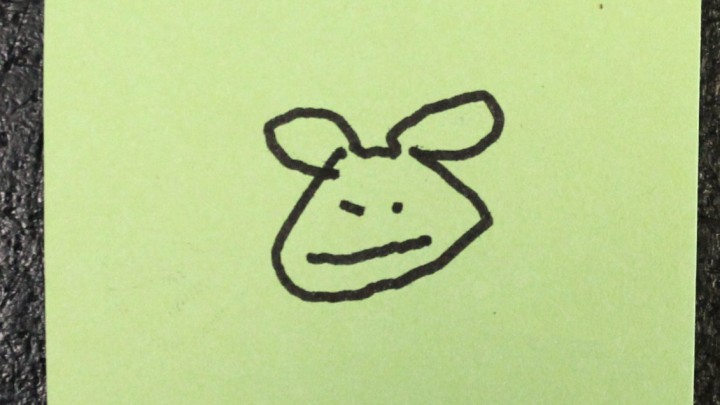
I did not find an option to load a bitmap or other image file into the app. Therefore, to create somewhat more elaborate drawings, you’ll have to draw them yourself directly in the app. This is probably easier with a stylus than with a finger. Disconnect the robot first before making your drawing. When the drawing is ready, connect the robot and tap the Redraw button to draw it. Unfortunately, you cannot save your drawing either. My first drawing...
The Drawing Robot Is Open Source
The download also contains the Arduino sketch that converts the commands received over its serial port to pen positions. As the source code does not contain any comments, you’ll have to figure out the communication protocol yourself. Luckily, the app shows the data it sends. It is an ASCII string containing an X and Y position (or angles) as floating-point values and a pen up or down indication as an integer. These values are separated by commas. A command string is terminated by the character ‘R’. An example string is "-42.1,56.9,0,R".
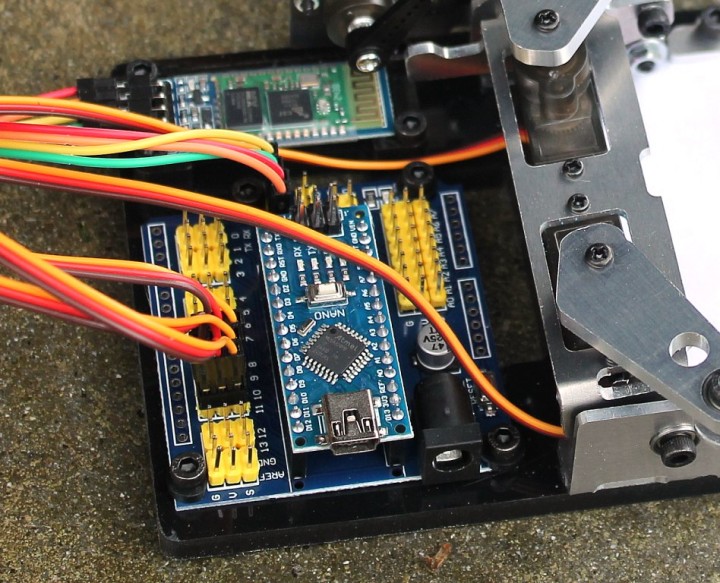
Commands must be acknowledged by sending the character ‘N’ back to the app. The speed over the serial port is 9600 baud. Note that if you want to upload a (modified) sketch, you must disconnect the Bluetooth module from the serial port to avoid conflicts. The drawing robot is controlled by an Arduino Nano with an HC-06 Bluetooth extension module.
Conclusion
Voilà, that’s it. If you are looking for a drawing robot capable of converting your family or holiday pictures into fun little drawings, then keep looking. If, on the other hand, you’re interested in controlling a robot arm over a serial port or Bluetooth and you don’t mind writing some software for this, then the drawing robot may be a kit for you. It is compact and strong, with metal-geared servos, making it a nice, long-lasting robot arm experimenting and Arduino learning platform.
Subscribe
Tag alert: Subscribe to the tag Robotics and you will receive an e-mail as soon as a new item about it is published on our website!
Read full article
Hide full article
Add a rating to this article
★★★★★
★★★★★
Page 1 / 1
Login
No account yet?Register for free!
Forgot password?
Please enter your email address. Instructions for resetting the password will be emailed to you now.


Discussion (0 comments)