Circuit: Weather Station with Online Data Access
on

Weather Station Circuit
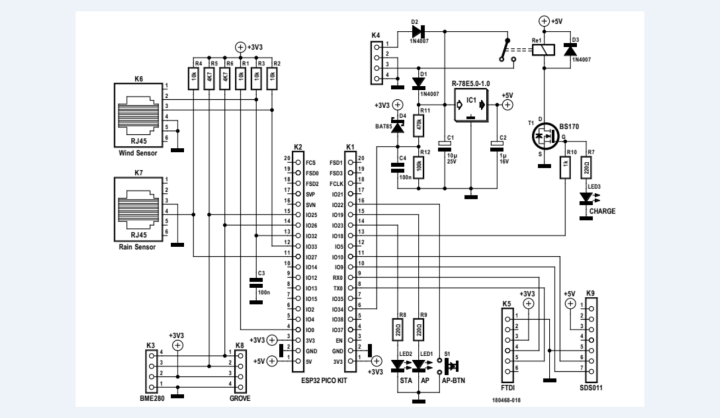
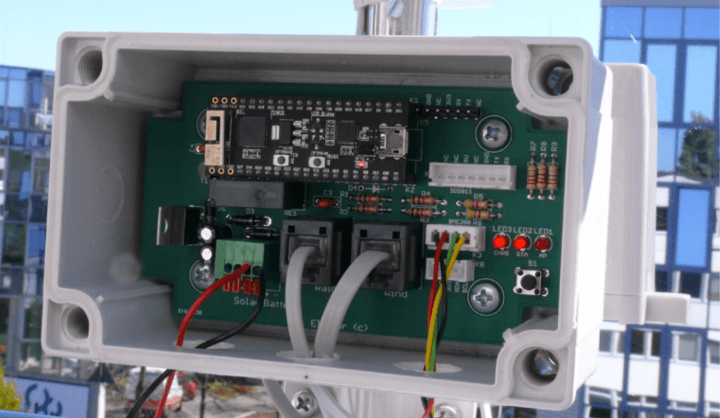
"The weather station is built around the ESP32 Pico Kit V4 (see the schematic), which handles all the necessary tasks," explain the Elektor engineers who worked on the project. "To make sensor connection and fitting in a waterproof enclosure (a Fibox PC 100/60 HT) a bit easier, we designed a carrier board. The wind and rain sensors are connected to the carrier board through RJ45 connectors, while the BME280 and SDS011 sensors are connected through JST XH connectors."

- Measures temperature, wind direction and wind speed, humidity, air pressure and precipitation
- Optional sensor for fine particles: Nova Fitness SDS-011
- Additional ports for Grove sensors or other devices
- Supports Thingspeak and senseBox
- Can be configured on the internal web page of the ESP32
- Operates from a solar panel, 12 V battery, and/or 8-28 V DC adapter

Weather Station Configuration
You can configure the station through a web page hosted directly by the ESP32. Upon startup, the ESP32 attempts to connect to the configured network, and if it fails, it automatically starts a web server to host the configuration page. The server can also be launched manually by pressing the button on the board when powering it on or by pressing the ESP32’s EN button. If no action is taken on the configuration page for 10 minutes, the ESP32 will restart and reconnect to the network, though this can be prevented by holding the button or bypassing it. The configuration page allows you to view current measurements, including battery voltage, and to adjust network and upload settings. Network settings include the SSID, which can be chosen from a list, and the password. Upload settings involve entering the necessary API keys for Thingspeak and senseBox, as well as setting the upload interval.

The Original Project
The article, “ESP32 Weather Station: Reading Sensor Data Online,” was published in Elektor Jan/Feb 2019. The article will be free to download for at least the two weeks after the publication of this news item. Enjoy!
Editor's Note: This article was first published in a 2019 edition of ElektorMag. Please note that some of the components, products (e.g., PCBs) and links may no longer be available. However, we believe the educational content remains valuable and hope it inspires you to start new projects.


Discussion (0 comments)