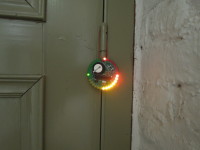
Diwali diya [150455]

The Diwali festival starts soon so it is time to decorate your home with beautiful diyas. We propose an original Diwali diya that you can build and program yourself. Slow animations, fast blinking or simply a multi-colour light, it is all possible with this design.
Soon the Diwali festival will begin so it is time to decorate your home with beautiful diyas. We propose an original Diwali diya that you can build and program yourself. Slow animations, fast blinking or simply a multi-colour light, it is all possible with this design. And for those who don't celebrate Diwali, this project is also great for Christmas.
To drive the leds an ATmega328p is used. The reason for that is because this microcontroller is easy to (re)program using the arduino IDE. The downside of the ATmega328p against the P87C51 (which was used in the previous version of the ball) is that the ATmega328p doesn't have 32 outputs to drive the leds individually. Thats why the leds are placed in a 4 x 8 matrix. This way only 12 outputs are used.
For the sake of originality and beauty I thought it would be nice to change the led colors to red, yellow and green. This turned out to be more complicated than I expected. The red and yellow leds were equally bright, but the green ones were very dim. It wasn't possible to change the resistors for the green leds because the leds were divided in 4 groups and the colors in 3. After a bit of searching, I eventually found a green led which was also equally bright as the other ones.
Beside the leds, there are also two buttons on the pcb: one button to change the mode and a powerbutton. when the powerbutton is pressed, the led circle goes in a sleep mode where very little power is used to save the batteries. With the mode button several patterns can be selected including a random mode in which a random pattern is displayed. The PCB has a diameter of 76.2mm. This way the leds will fit on the outside of the circle. The rest of the components fit nicely inside the ring.
Happy Diwali!


Discussion (0 comments)