One way to find and create the engineers of tomorrow is to look among our children. The idea is to provide them with fun and easy-to-use tools and exercises and then hope that this will ignite their internal techno flame or at least spark some interest. The Arduino Alvik fits in this scheme.
One way to find and create the engineers of tomorrow is to look among our children. The idea is to provide them with fun and easy-to-use tools and exercises and then hope that this will ignite their internal techno flame or at least spark some interest. The Arduino Alvik fits in this scheme.
More and more technicians, engineers and developers are needed every day to keep our continuously evolving technology-driven society up and running. These people have to be found and trained, a complicated task, especially the finding part. Despite the many science- and technology-popularizing programs and campaigns that have been launched over the past decades and the numerous low-entry-level tools and platforms that have been created, still too few people opt for a career in science, technology, engineering or mathematics, commonly abbreviated to STEM (or STEAM if we add art).
The Arduino Alvik for Teaching Children
One way to find and create the engineers of tomorrow is to look among our children. The idea is to provide them with fun and easy-to-use tools and exercises and then hope that this will ignite their internal techno flame or at least spark some interest. The Arduino Alvik fits in this scheme.
What is the Arduino Alvik?
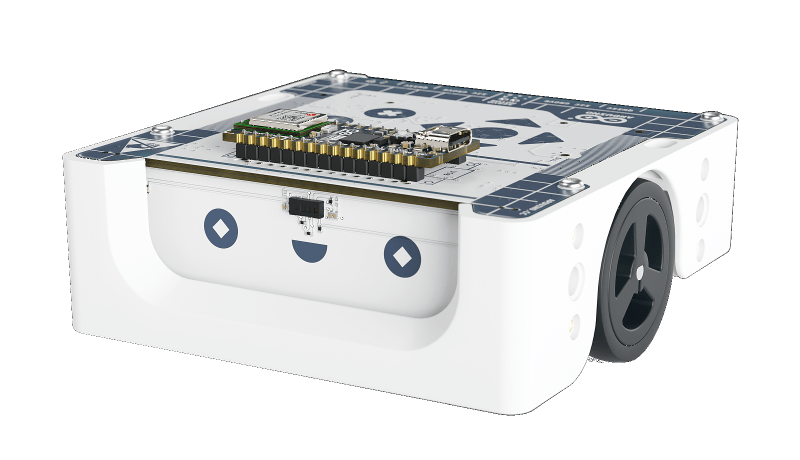
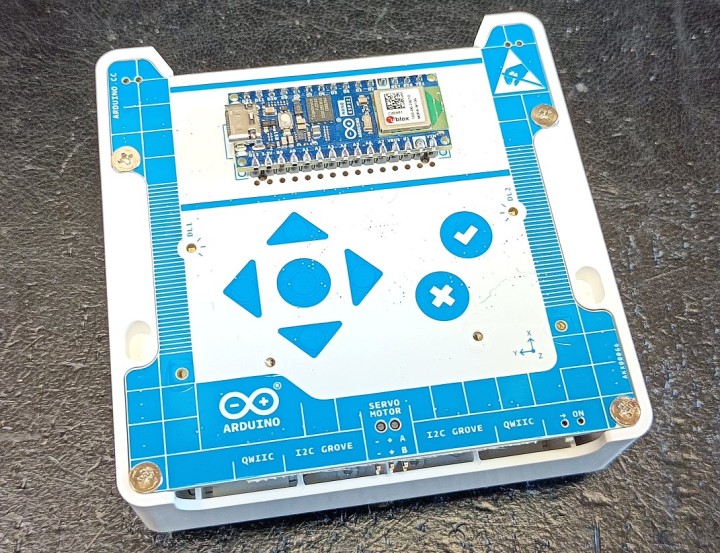
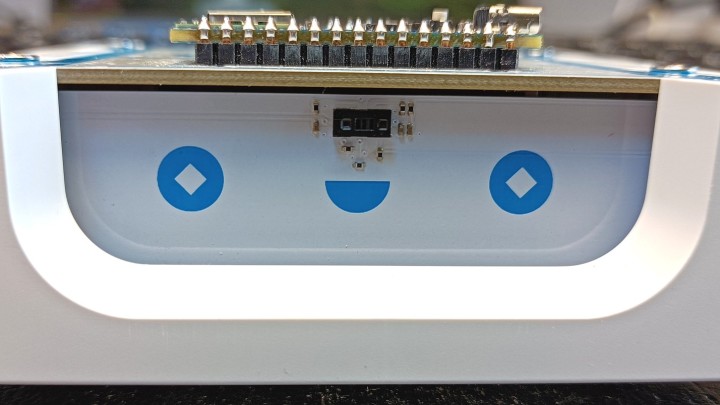
The Arduino Alvik is a mostly white, flat, square 9.6 cm by ___ cm (How STEM are you? Can you fill in the missing dimension?) autonomous robot vehicle platform with a height of approx. 45 mm (measured by me, I couldn’t find official dimensions). The top side has abstract graphics printed in blue on it; the front has a smiley face. Overall, the Alvik looks nice and feels robust.
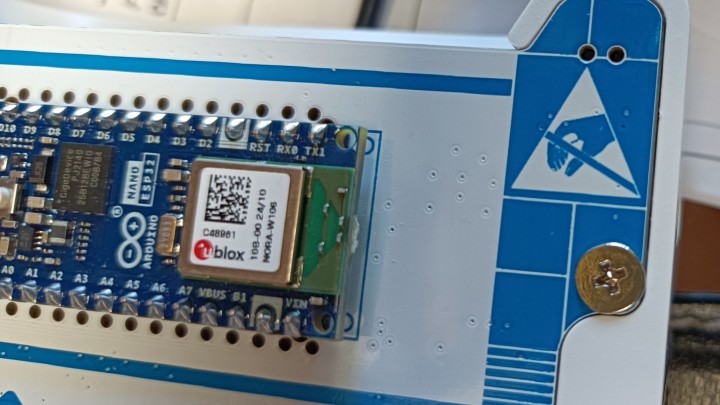
Bare Electronics
A don't touch warning on an educational robot for children?
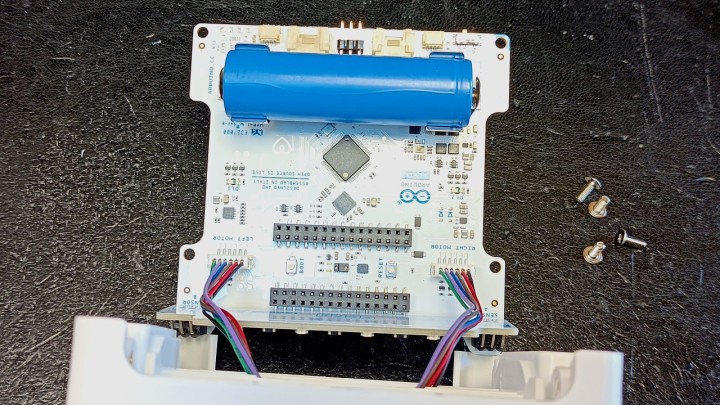
Unfortunately, the impression of robustness is somewhat diminished by the Arduino Nano ESP32 board exposing unprotected electronics mounted on top of the Alvik and a kind of do-not-touch icon next to it. True, the Nano board is removable, but it is also the main controller providing Wi-Fi and Bluetooth and it is the battery charger…
The Arduino Alvik has Sensors
The friendly front side has a Time-of-Flight (ToF) sensor on it. On the rear side is a row of I²C connectors in Qwiic (Sparkfun) and Grove (Seeed) format. There you’ll also find the On/Off slide switch and a pin header for connecting up to two servo motors. I²C-based extension connectors on the rear.
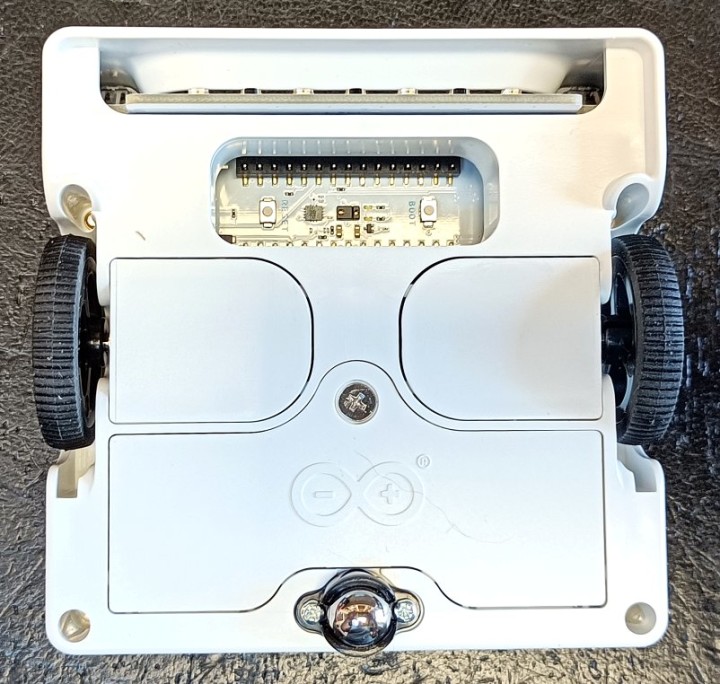
Turning the robot over unveils the line-following sensor array (which, strictly speaking, is mounted on the front side). Visible too are the accelerometer, the color sensor with a bright white LED plus two tiny pushbuttons (Boot and Reset) at the bottom of a rather deep hole. Let’s hope these two buttons are not needed often.
Replaceable Battery
Bottom side.
On the bottom is also the battery cover that provides access to the removable, 18650-type li-ion cell. The idea is that the teacher has spare charged batteries so a battery can be replaced quickly when it is empty instead of ending the class prematurely.
Mechanical Extension
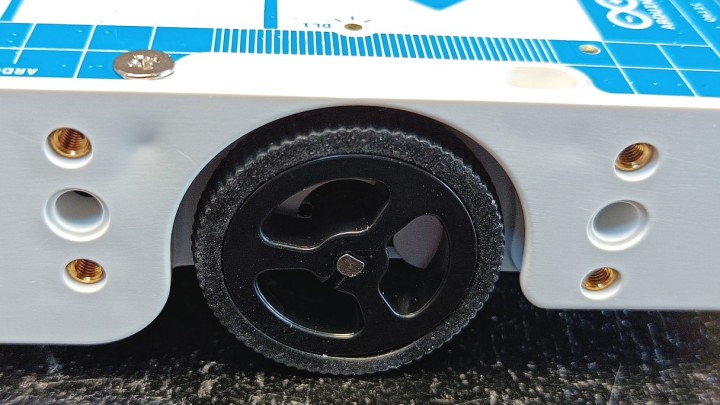
Mechanical extension holes, two of which are compatible with Lego Technic.
The robot has two wheels and a metal-ball-type caster wheel to keep it from falling over. Both wheel sides each have six mechanical extension holes. Two of them are compatible with Lego Technic, and the four others are for M3-type screws. Although not intended for this, you could also mount something on top of the Alvik by using the top fixing screws. The top side also has two oval notches, but it is not explained what these are for.
Touch-Sensitive Keypad on the Top Side of the Arduino Alvik
The top side is actually the rear side of the main circuit board. Looking closely at the graphics shows that they form a capacitive touch keypad with seven keys (Up, Down, Left, Right, Enter, OK & Cancel). There are also two RGB LEDs (DL1 & DL2), one above each wheel. The Alvik has a capacitive touch pad on the top side.
The Nano board is lined on both sides with a row of holes that can be used with breadboard wires (a.k.a. Dupont or jumper wires). This allows the Nano to interact with external circuitry on e.g. a breadboard. Interestingly, the TX1 pin of the Nano board is not accessible in this way. I am sure there is a good reason for that.
The remaining tiny holes do not have sensors or LEDs hidden behind them, they are simply fixation and alignment holes for parts mounted on the other side of the board. A peek at the insides of the Alvik. The large IC is the STM32 MCU.
What can you do with it?
After charging the battery (the LED on the Nano board indicates charging status) and switching the robot on, nothing happens besides some LED flashing. This is not completely true, however, because when LEDs DL1 and D2 finally turn blue, the robot is actually waiting for your input. With the Up and Down keys, you can now select one of three demos: Red (program a path, then make the robot follow it), Blue (black line follower) and Green (hand follower). Nice demos that work fine. Not game changers, but they do allow you to get playing right away.
Enter MicroPython
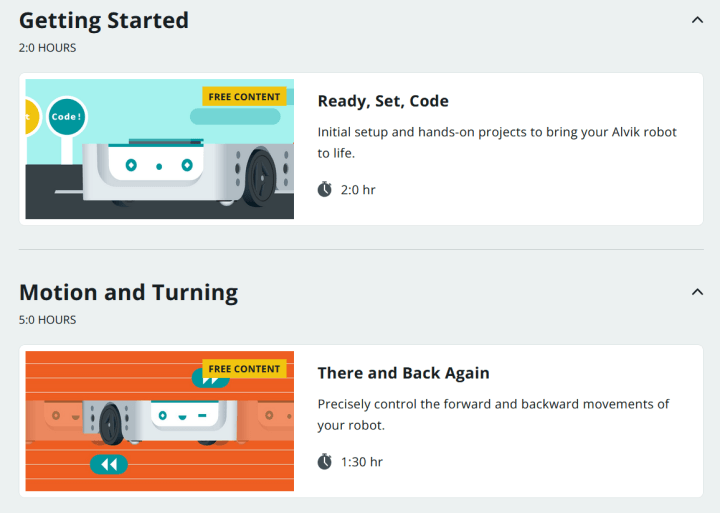
Once done playing, you can continue to the next exercise, which is a deep dive into MicroPython. You’ll install the Arduino Lab development environment for creating Alvik programs and try an example. People new to programming might feel a bit lost here. Some of the free programming lessons. (source: Arduino)
If, after climbing this hill, you are still interested, you can move on to the free programming lessons. At the time of writing this review, there were eleven, from basic LED blinking to finding a (virtual) charging station. All of this is in MicroPython, and a helpful generic MicroPython beginners’ course has not been forgotten.
School Plan
More courses are included in the Arduino-cloud-based School Plan, but as I don’t have one (it is not free), I couldn’t check them out. The Alvik (top left) is just a small part of an extended STEM curriculum. (source: Arduino)
Other Programming Languages
Even though I looked everywhere (I think), I didn’t find a lot of technical information about the Alvik. Programming the Alvik in another language than MicroPython is possible (of course it is), but how? A schematic, for instance, would have been nice, or a document explaining how the Nano communicates with the STM32 MCU.
Conclusion
The Arduino Alvik is a charming and carefully designed versatile and expandable mobile robot platform with wireless features and enough processing power for doing fun experiments and other stuff. Honestly, I don’t believe there is anything wrong with the product itself (even though I find it somewhat expensive at €150 or so). Maybe add a protective cover for the Nano board?
Is the Arduino Alvik a Game Changer?
The Arduino Alvik is supposed to be more than just a little robot, however. It is claimed to be an educational game changer for STE(A)M training, and this I fail to see. It is not a new concept; I have seen other products like this many times before.
AI Support?
Even though Arduino did produce quite a lot of documentation and exercises for the Alvik, which is great, it is incomplete and only addresses MicroPython. Support for Arduino itself would have been logical, of course, but also some more details about the underlying hardware should be helpful for interested users. Actually, it feels a bit like the Alvik hardware was launched before the content producers were ready. And what about ChatGPT-like programming support? Alvik keeps a happy face, even when its program isn't working.
Is MicroPython the Solution?
Furthermore, I really don’t understand how one can expect to motivate children (or anyone) to get into engineering or science or art by throwing MicroPython code at them (or any programming language for that matter). You don’t need robots to learn programming:
Take your bike
Mount it
Start pedaling
Ride to the shop
Get off your bike
Enter the shop
If they have milk, buy one liter
Else, wait forever /* TODO: handle exceptions gracefully */
Go home
Now rewrite this using a programming language of your choice without making a single typing mistake.
Jeez! Sooo boring! What’s on TikTok?
Subscribe
Tag alert: Subscribe to the tag Arduino and you will receive an e-mail as soon as a new item about it is published on our website!
Read full article
Hide full article
Add a rating to this article
★★★★★
★★★★★
Page 1 / 1
Login
No account yet?Register for free!
Forgot password?
Please enter your email address. Instructions for resetting the password will be emailed to you now.


Discussion (0 comments)