My journey into the Cloud (5); Control that lamp
February 10, 2016
on
on

In the previous installment I showed how easy it was to install a small PC Client using the MQTT protocol. It helps that there are already test-servers (Brokers) installed in the net which can be used for forwarding your own messages. On top of that, the official MQTT site has Open-Source libraries implemented for just about all possible programming languages. For this example I chose the MQTT Client for the .NET-C# library M2MQTT. Using my Client software (available for you to use also) you can publish messages using a specified Topic and also subscribe to the Topic. This allows you to send text messages from one PC to another anywhere in the world.
That all works pretty well but isn’t exactly the kind of application you necessarily associate with ‘Internet of Things’ networking. We really want to achieve physical control over the Internet in order to, for example, turn a lamp on and off. Ideally the lamp will be controlled via a radio link so there wont be any wires trailing around the house to trip over. Fortunately for me we already have lots of hardware and software on hand here at Elektor to help achieve this goal. It looks at though everything is in place to start building my first IoT application to control the desk lamp in my study.
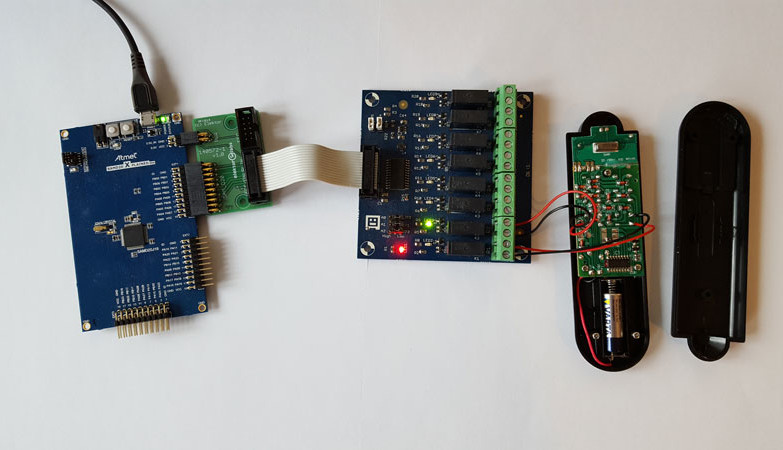
First off I programmed a small extension to my existing PC Client. Now when the subscribed message character strings arrive they are not only displayed in the ‘Received text’ box but will also be sent out from the PC’s USB port (a dropdown box allows selection of the virtual COM port). Now with the help of an Arduino or similar development platform together with an FTDI cable, you can pass serial data from the USB port. I chose the SAM-D20-development board which we used in our ARM course; the SAM D20 to Gnublin/EEC relay board is connected via the EEC adapter connector. The demo software included in the article for the Elektor EEC adapter runs on the SAM D20. It is able to interpret a sequence of bytes such as ‘R 0 x +’ (where x = 0 to 7) to activate the corresponding relay.
Subscribe
Tag alert: Subscribe to the tag Journey into the Cloud - Article series and you will receive an e-mail as soon as a new item about it is published on our website! That all works pretty well but isn’t exactly the kind of application you necessarily associate with ‘Internet of Things’ networking. We really want to achieve physical control over the Internet in order to, for example, turn a lamp on and off. Ideally the lamp will be controlled via a radio link so there wont be any wires trailing around the house to trip over. Fortunately for me we already have lots of hardware and software on hand here at Elektor to help achieve this goal. It looks at though everything is in place to start building my first IoT application to control the desk lamp in my study.
First off I programmed a small extension to my existing PC Client. Now when the subscribed message character strings arrive they are not only displayed in the ‘Received text’ box but will also be sent out from the PC’s USB port (a dropdown box allows selection of the virtual COM port). Now with the help of an Arduino or similar development platform together with an FTDI cable, you can pass serial data from the USB port. I chose the SAM-D20-development board which we used in our ARM course; the SAM D20 to Gnublin/EEC relay board is connected via the EEC adapter connector. The demo software included in the article for the Elektor EEC adapter runs on the SAM D20. It is able to interpret a sequence of bytes such as ‘R 0 x +’ (where x = 0 to 7) to activate the corresponding relay.
Read full article
Hide full article


Discussion (0 comments)