Review: Lime SDR Mini
August 14, 2019
on
on
A first test run with the LimeSDR Mini
During experiments and developments you might wish to occasionally see the spectrum produced by your own circuit, or whether the built-in receiver could receive a signal at the location. It is also nice to have the right tool at hand when it comes to eliminating interference or analysing it. For this purpose many people use an RTL-SDR, which is versatile and cheap. This solution works in the frequency range between 24 MHz and 1700 MHz, depending on the tuner used, and is a flexible but somewhat "deaf" solution for your own experiments. Also the bandwidth, or here the sampling rate, is usually 2.4 MS/s and allows viewing a maximum of 2.4 MHz in the spectrum. Beside the "deafness" we can only receive signals; generating test signals is not possible although that's sometimes desirable to test your own developments in a defined way.
The hardware

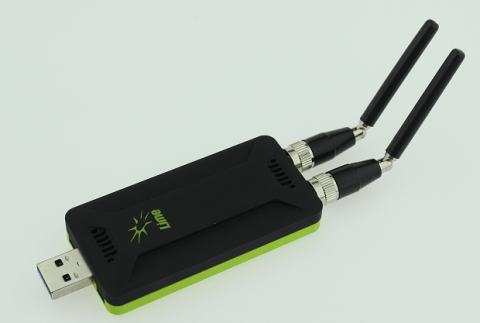
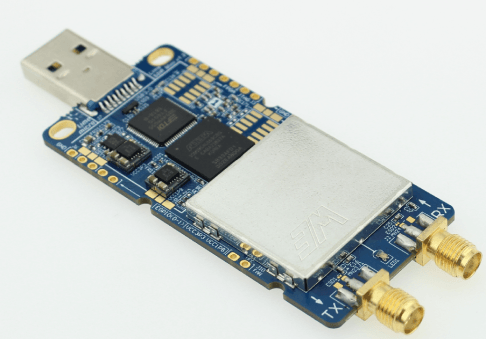
The heart of the SDR is the LMS7002M transceiver, which is equipped with 12 bit DA/AD converters for signal processing. The chip itself should cover a frequency range from 100 kHz to 3.8 GHz, which is however limited to 10 MHz to 3.5 GHz, as well as in bandwidth from 61.44 MHz to an actual 30.72 MHz. Being a transceiver, the LimeSDR Mini can transmit as well as receive signals in "broadband" mode. Up to 10 dBm of transmit power is available at the output.

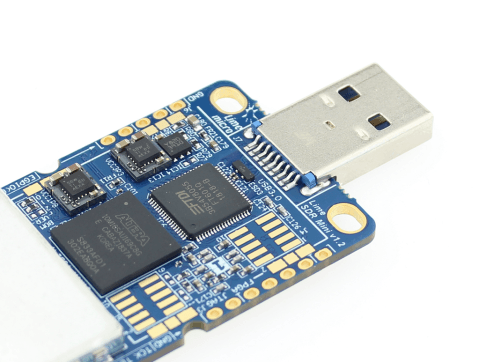
To be able to connect your own antennas, there is one SMA connector each, clearly marked 'RX' or 'TX'. The possibility to connect multiple antennas for transmitting and receiving as with the big brother, the LimeSDR, was not implemented here to reduce hardware costs. Beside the transceiver and the USB bridge there is a MAX10 FPGA in the centre, which controls the communication between the transceiver and the USB bridge. The bitstream required for the FPGA can be generated with the free version of Intel Quartus and loaded into the FPGA with the appropriate tool.

Using the data sheets and the circuit diagrams the FPGA can be supplied with a new bit stream to adapt the hardware to your own needs, as you can see from the work of Gaspar Karm. But when we now generate a signal, we depend on the quality of the reference clock for frequency stability. On the board there is a Rakon 40 MHz VCTCXO with +/-1 ppm (RTX5032A) installed. If you don't want, or can't use it for your applications, you may opt to connect your own reference for the system. On the board, suitable UL.F connectors are provided to measure the internal reference or to feed a different clock signal from an external source, the latter requiring the removal of a pair of resistors. Not only the technical data for the SDR is important, but also the software support.
Drivers and software
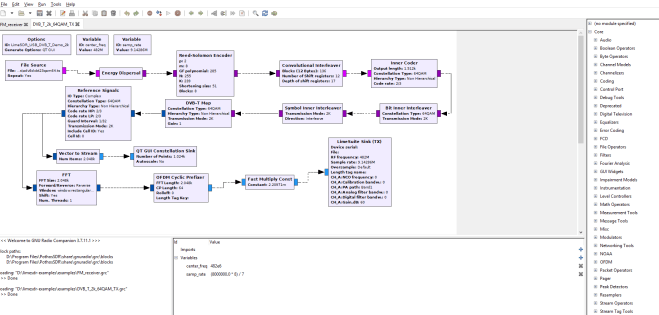
The Windows 10 drivers of the FTDI FT601 USB3.0 Bridge are automatically available, but you may have to manually start the search for the drivers after the initial plug in. For Windows 7 it may be necessary to download the drivers from the FTDI side. With the "Pothos SDR dev dev enviroment" we have a good basic package allowing us to install GNUradio/GRC/OsmoSDR, GQRX and CubicSDR with the necessary plugins for the LimeSDR Mini. This provides a well-equipped toolbox under Windows, including the LimeSDR Suite for hardware diagnosis and configuration. The GNUradio support makes the signal generation and the signal reception very versatile. The generation of a DVB-T signal, the transmission and reception of FM as well as FM + RDS are provided as examples. SDR# can also be used with the LimeSDR Mini if a suitable plugin is used.Looking at the software, you will notice that many of the tools have been ported from the Linux world onto Windows. The tools mentioned, as well as others, are available for the common Linux distributions and can usually be installed there directly using the package management. These are also not limited to the X86/AMD64 architecture, running the LimeSDR Mini on the Raspberry Pi 3B+ is possible, which has already been proven with the setup of GSM base stations. And those of us on the road with a Mac and don't want to or can't do without the MacOS, have a suitable catalog of software to choose from, even if it means that on occasions you can't avoid compiling code yourself.
Test run
The Elektor laboratory in Aachen does not offer good reception conditions, which we already noticed during the development of the piRadio. In addition to the reception test, a short transmission test was carried out under laboratory conditions.

The compact size is pleasant when it comes to stowing the SDR in a sheet metal housing, but has the disadvantage of high component density. Due to the proximity of the components to each other, it is not easy to shield unwanted interference from them to the receive path. Some compromises have been necessary in terms of price, size and performance. Some side effects are discussed in the myriadrf forum.
Conclusion
Before use, it is advisable to take a closer look at the peculiarities of the miniaturised version. Maybe one or the other will modify the LimeSDR Mini to avoid the side effects of miniaturization. Nevertheless, the LimeSDR Mini, at a price of 180 euros, is an interesting hardware base that stands out due to its wide frequency range and transmission and reception bandwidth. For those who are looking for a way to generate test signals in their laboratory that are broadband and beyond 900 MHz, the LimeSDR is an inexpensive way to achieve this.Read full article
Hide full article


Discussion (2 comments)